


| Buy from US |
Buy from UK |
Buy from DE |
Buy from IT |
Buy from FR |
Buy from ES |
ここでご購入を! |
 |
 |
 |
 |
 |
 |
 |
Introduction
In this project, we’ll explore how to control each LED individually in an e-textile circuit. We’ll look at two ways to control the flow of current to an LED — using a button and a slide switch — while crafting a creative light-up plush creature.
Materials and Tools
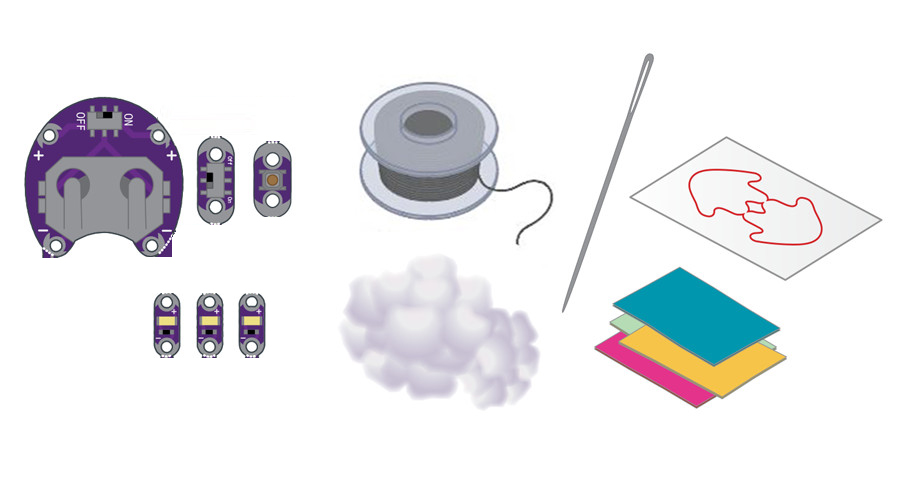
• 1x LilyPad Coin Cell Battery Holder
• 3x LilyPad LEDs
• 1x LilyPad Button Board
• 1x LilyPad Slide Switch
• 1x Coin Cell Battery
• Conductive Thread and Needle
• Plush Templates (1 piece)
• Felt (one 9″x12″ sheet of craft felt will make one plush; use scraps of felt to add decorations)
• Fiberfill Stuffing (not included in the kit)
• Embroidery or Sewing Thread (not included in the kit)
Planning Your Project
For this project, we’ll be using the Light-Up Plush template (download below or use the template included with your kit). If needed, download and print the provided template.
Click here to download:
Note: If you can’t download the PDF files by clicking the links above, copy and paste the following URLs directly into your browser:
https://osoyoo.com/picture/20170052LP-lilypad-kit/download/LightUpPlush_Template_1.pdf
https://osoyoo.com/picture/20170052LP-lilypad-kit/download/LightUpPlush_Template_2.pdf
https://osoyoo.com/picture/20170052LP-lilypad-kit/download/LightUpPlush_Template_3.pdf
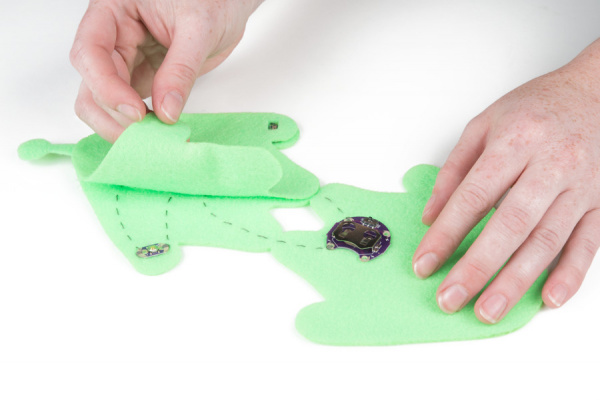
Trace and cut out the plush template shape on a piece of felt. To hide your stitches entirely, cut out an extra half-piece of felt (as shown) to place on top of your finished plush.
The two halves of what will become your plush are connected at the “feet” to allow your entire circuit to sit on one surface and to make stuffing the project easier. Don’t cut these two halves apart.
Understanding Your Circuit
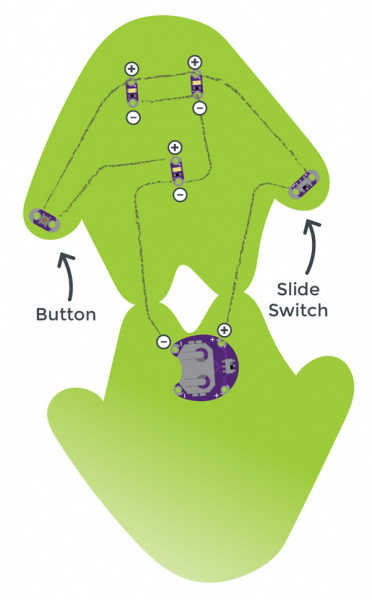
Arrange the pieces on the felt according to the diagram above. Make sure to check the orientation of the LilyPad LEDs before you stitch them. The positive tabs of the LEDs connect to the button or switch, and the negative tabs connect to the negative tab on the battery holder. Once your circuit design is finalized, use a small dab of glue on the back of each component to hold it in place on the felt.
This project involves a lot of stitching. If you want to hide the stitches, add a layer of felt or decorations over the thread after you’ve finished your circuit.
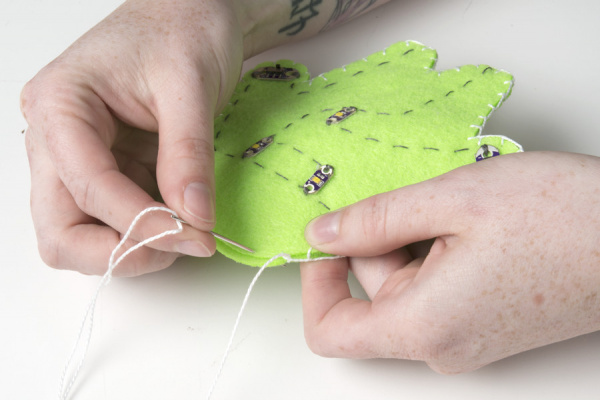
Stitching It Together
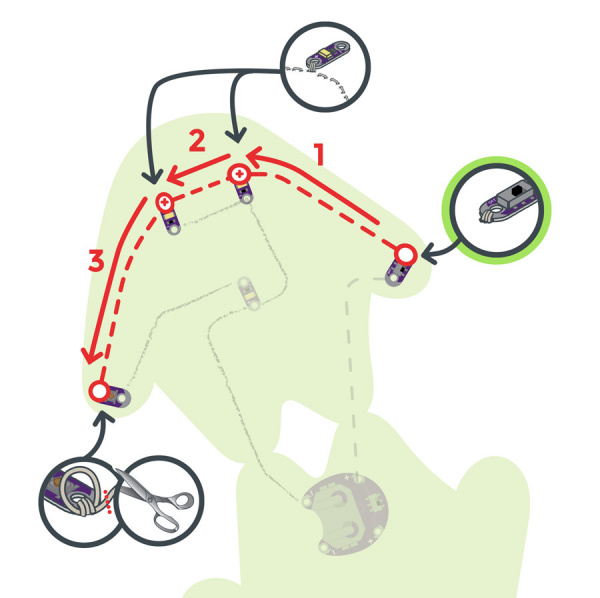
STEP 1:
Cut a long piece of conductive thread, thread the needle, and tie a knot at the end. Begin sewing at the positive sew tab on the battery holder closest to the fold or “feet” of the felt cutout. Use three to four loops around each sew tab as you work.
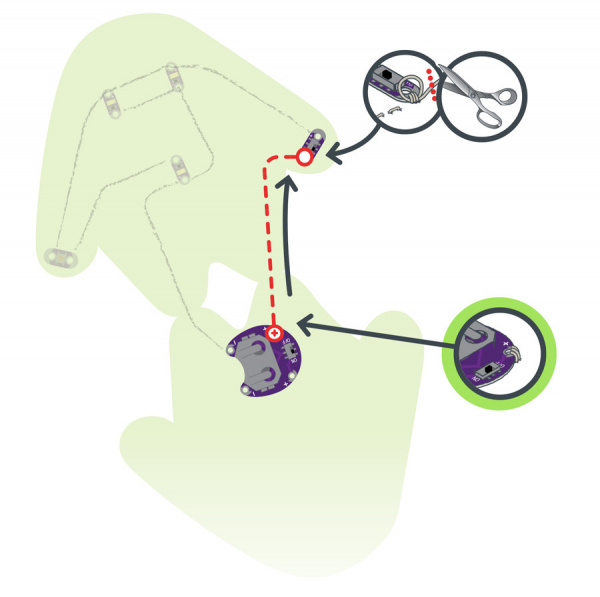
Use a running stitch or hidden stitch to connect the positive sew tab on the battery holder to the nearest sew tab on the switch. Sew three to four loops around the switch’s sew tab to secure it, then tie a knot and cut.
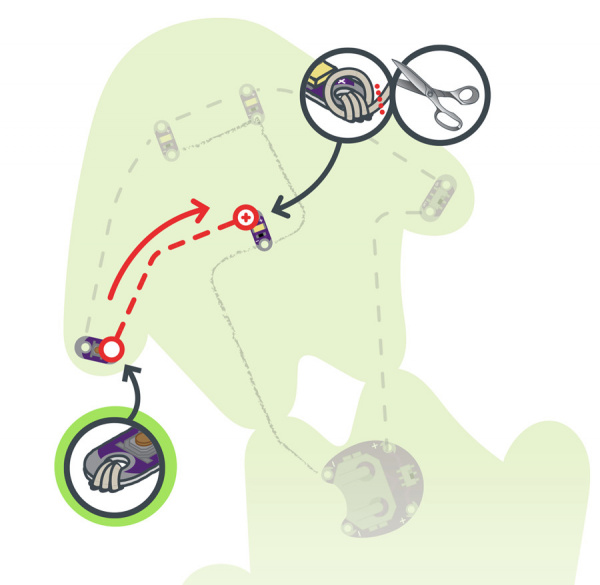
STEP 2:
With a new piece of thread, connect the other side of the switch to the positive sew tabs of the top two LEDs and end with three to four loops on the nearest tab of the button. Tie and cut.
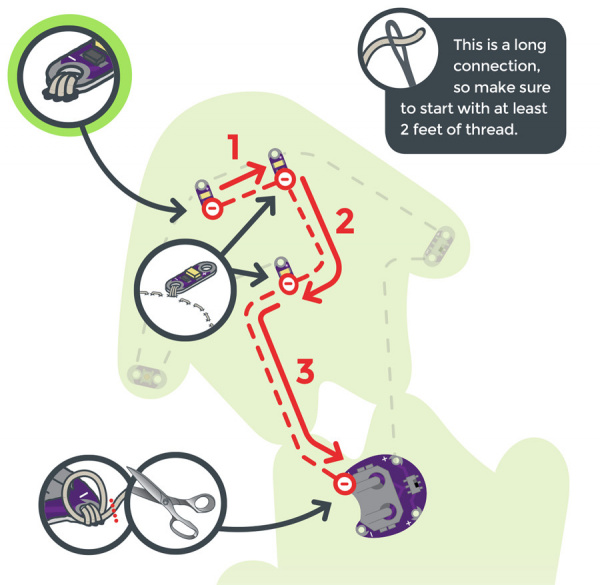
STEP 3:
With a new piece of thread, begin at the other side of the button and stitch three to four loops around its sew tab. Continue stitching to the positive side of the last LED, ending with three to four loops.
Tie and cut.
STEP 4:
Finally, stitch all the negative connections. With a new piece of thread, stitch three to four loops on the negative (–) sew tab of the first LED, then connect to the negative tabs on the other LEDs, ending at the negative tab of the battery holder as shown. Loop three to four times around each connection.
Installing Your Battery and Testing
Insert the coin cell battery into the battery holder with the positive (+) side facing up. Test the button and switch to confirm that the LEDs light up. If they do, remove the battery and move on to the Finishing Touches section.
Finishing Touches
Conductive thread can be part of the visual design or kept hidden. To hide stitches, add a layer of felt on top with cutouts to let the LEDs shine through and to provide access to the button and switch.
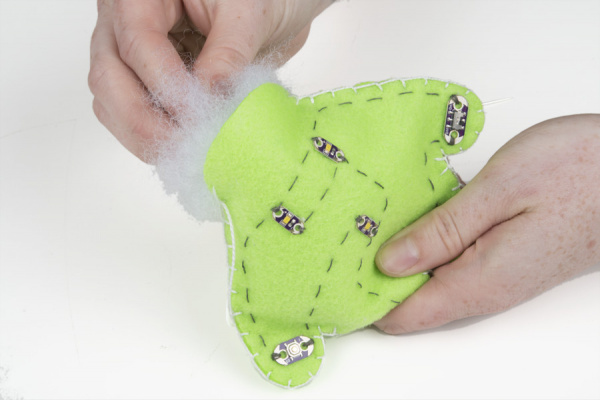
Once you’ve finished testing, it’s time to make the plush three-dimensional. Remove the battery, and fold the felt at the connected points (feet) at the bottom so the LilyPad components face outward. Using non-conductive sewing or embroidery thread (or a glue gun), seal all but about 2 inches at the top of the plush — this opening is where you’ll add the fiberfill stuffing.
Push fiberfill stuffing into the opening to fill the plush. Use your fingers or a pencil to push it into the arms and legs. The stuffing gives the plush its shape and also insulates the conductive thread stitching inside. Stitch the opening closed with embroidery or sewing thread to finish the project.
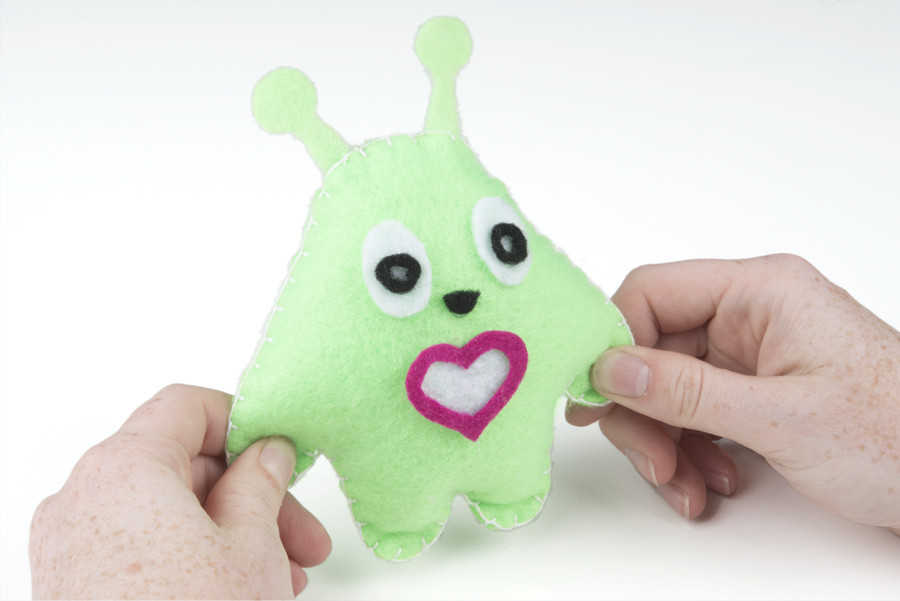
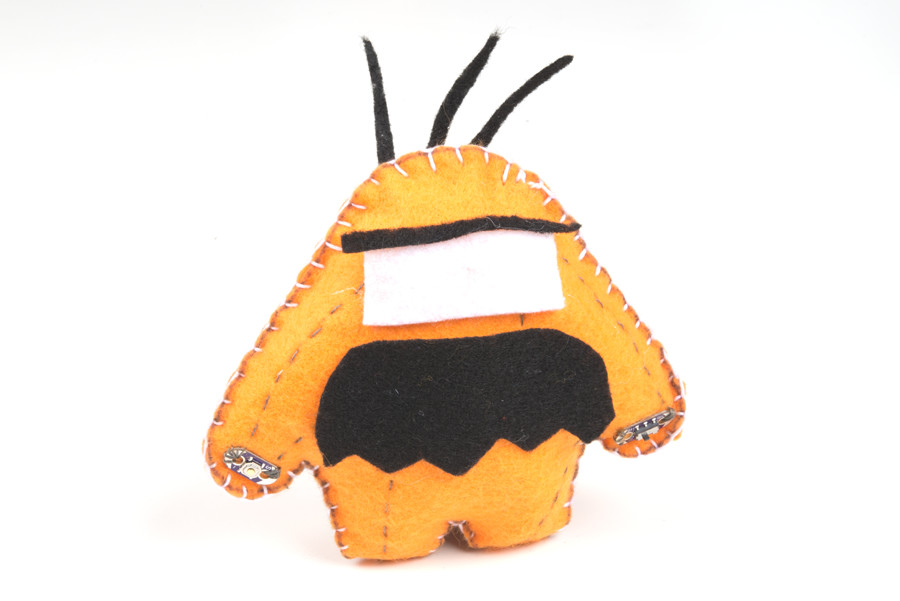
You can use craft supplies such as glitter, paint, or other decorative accents to embellish the plush or cover the LEDs and stitching. To protect the battery holder and battery, make a small flap of felt to cover them and secure it with velcro for easy access.
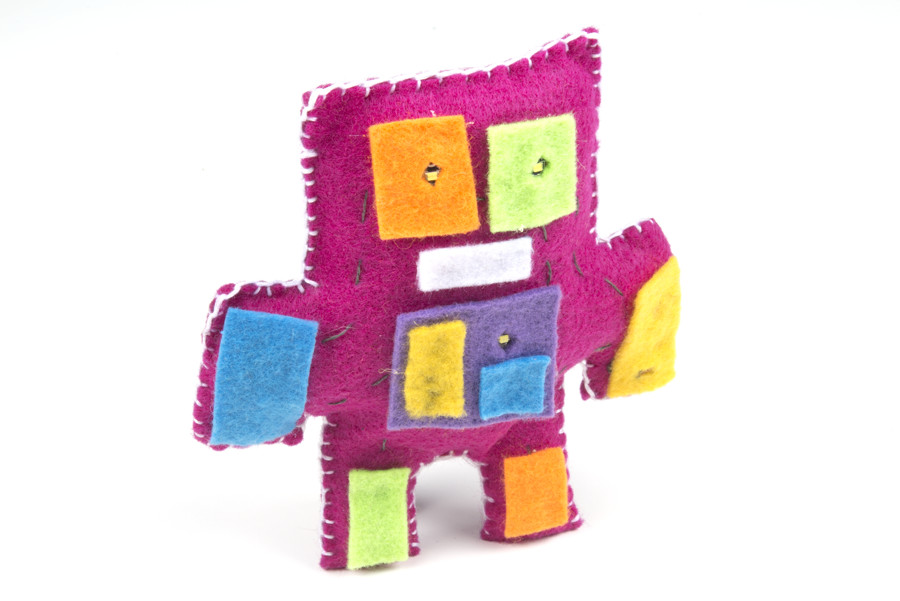
Here are a few examples of finished plush projects with creative decorations:


~~~~~~~~~~~~~~~~~~~~~~~~~~~~~~~~~~~~~~~~~~~~~~~~~~~~~~~~~~~~~~~~~~~~~~~~~~~
LilyPad Sewable Electronics Projects:
~~~~~~~~~~~~~~~~~~~~~~~~~~~~~~~~~~~~~~~~~~~~~~~~~~~~~~~~~~~~~~~~~~~~~~~~~~~


