Model 2021006600
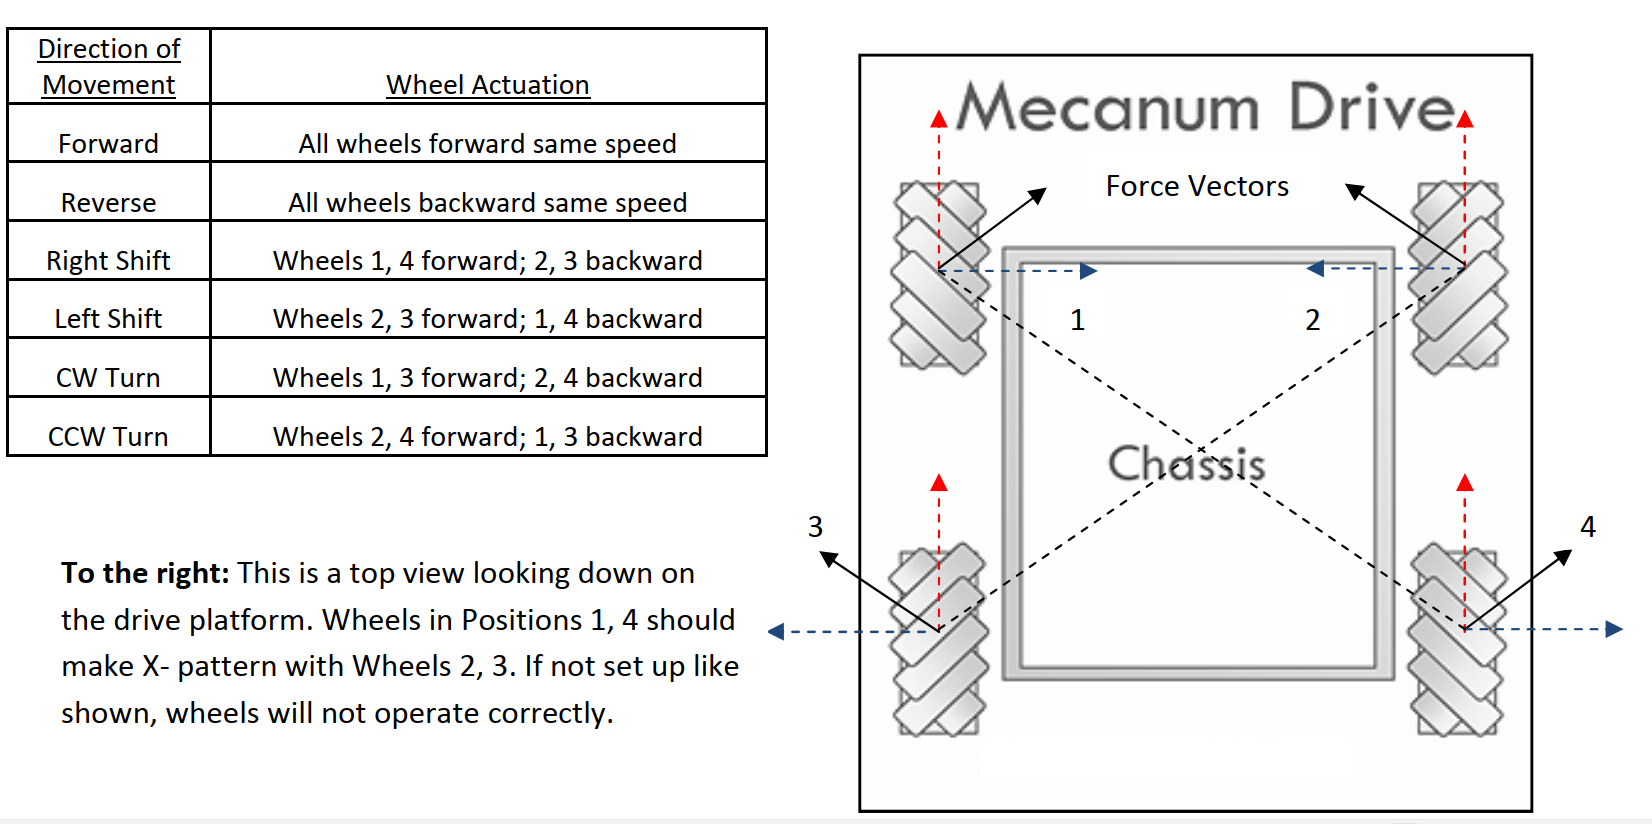
Mecanum Omni direction wheel is a very interesting wheel which allows robot car make omni-directional movement (e.g. parallel shift to left and right).
In this project, we will show how to use Arduino to control an Osoyoo brand Mecanum wheel robot car to make some basic movement including go forward, backward, left turn, right turn, parallel left shift, parallel right shift etc.
This lesson also shows you how to install the chassis of this car and connect Arduino control signal wires to model Y board. This installation will be the start point of our other lessons.
OSOYOO Mecanum wheels robotic car chassis x1
OSOYOO Wheels and motors x4 (left-wheels x2/right-wheels x2)
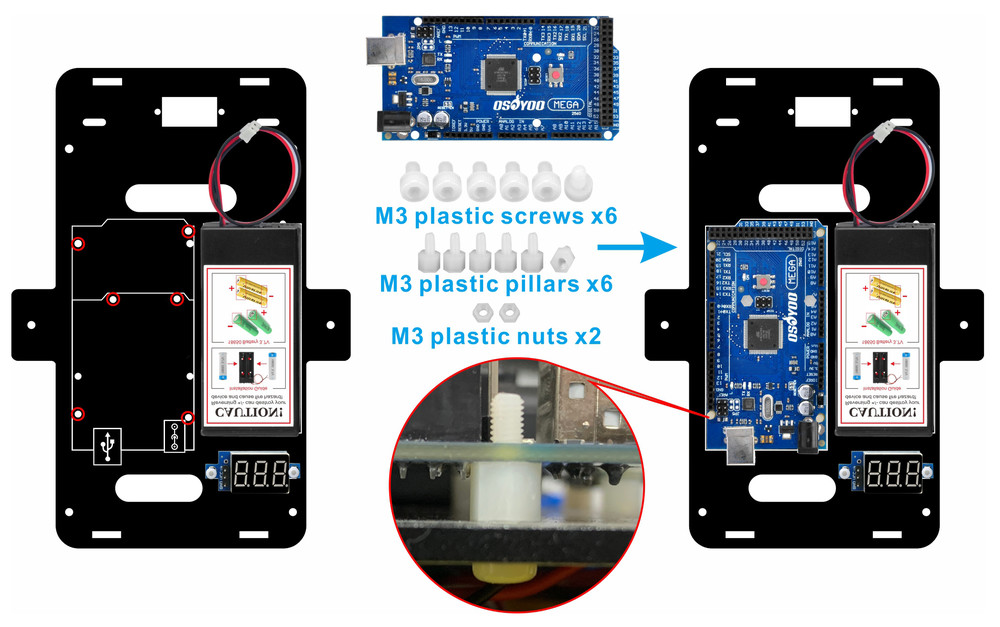
OSOYOO Mega2560 board fully compatible with Arduino UNO/Mega2560 x1
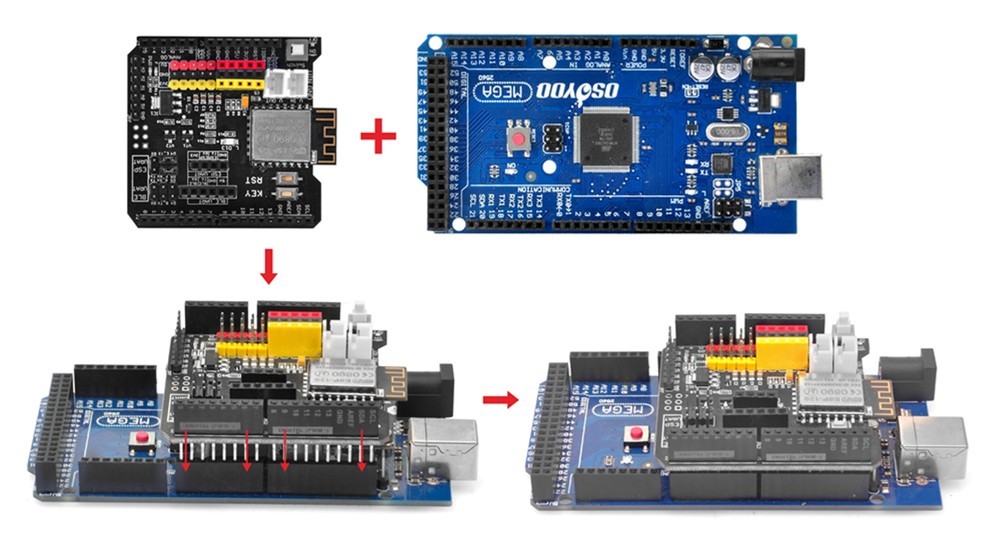
OSOYOO Uart WIFI shield x1
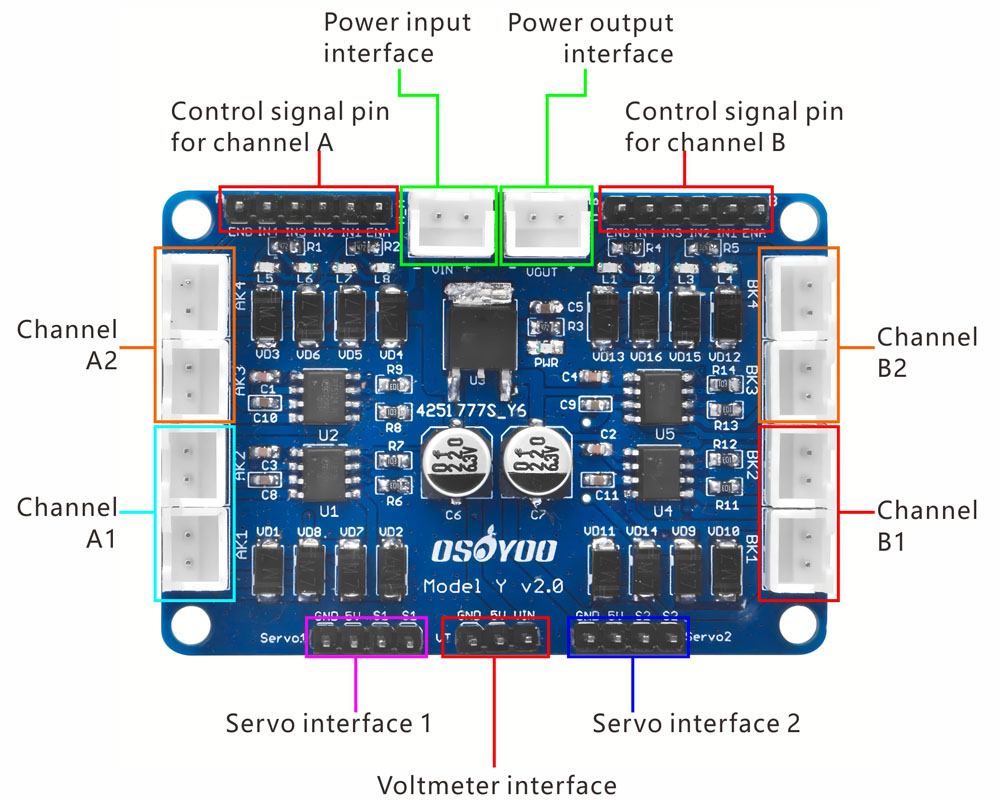
OSOYOO Model Y Motor driver board
(it is integrated with two pcs of TB6612 H-Bridge Driver which can control 4 separate channel and 8 PWM output ports.)
OSOYOO Voltage meter x1
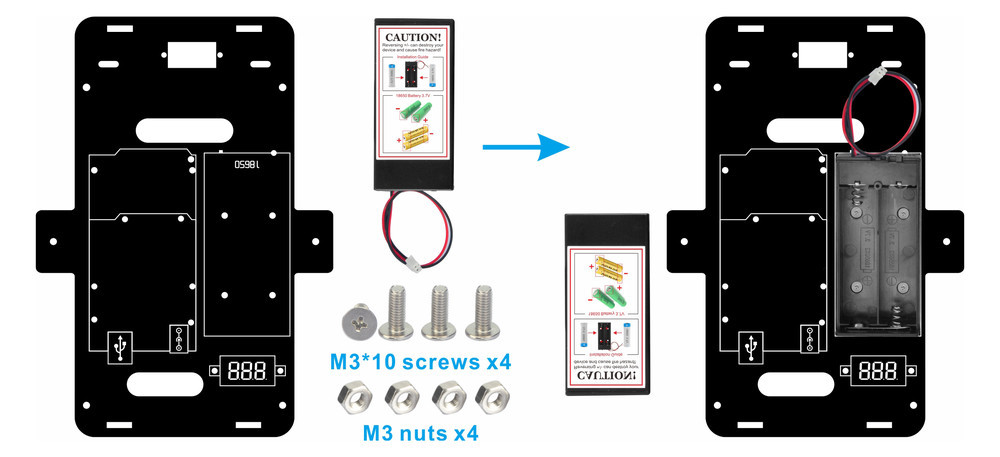
OSOYOO Battery box x1
OSOYOO 6pin male to female jumper wire x2
OSOYOO 3pin female to female jumper wire x1
OSOYOO 2 pin PnP female to female x1
18650 Batteries (3.7 V) x2
Battery charger x1
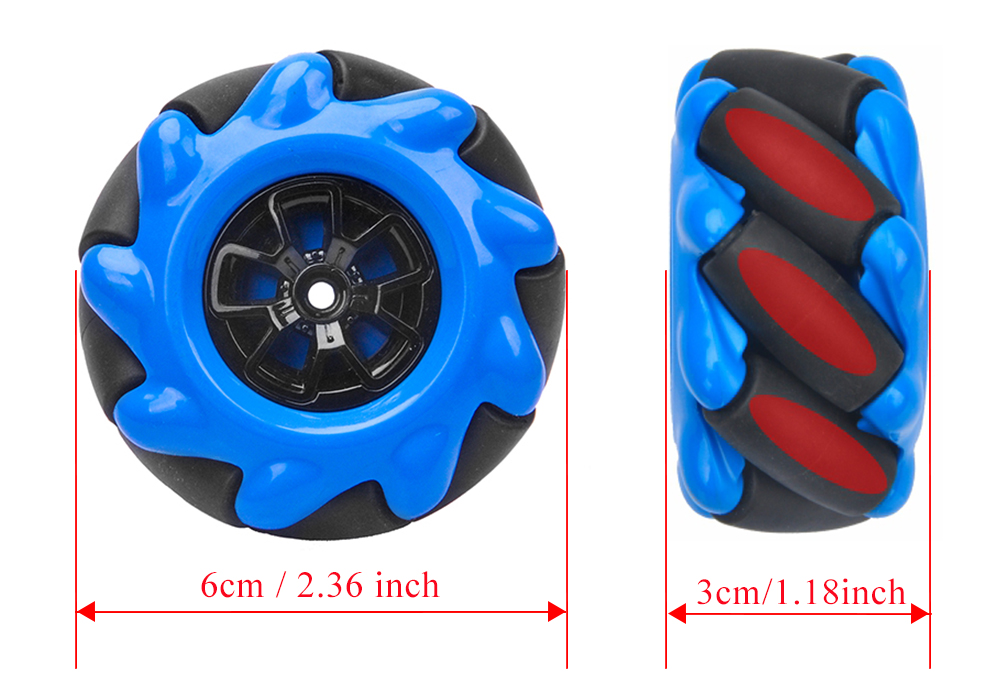
Dimension
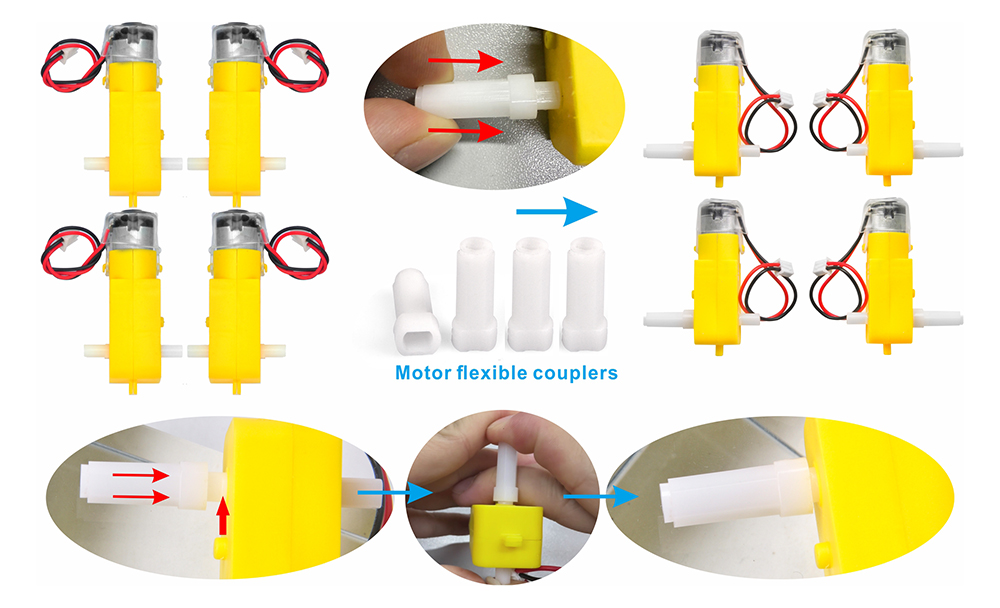
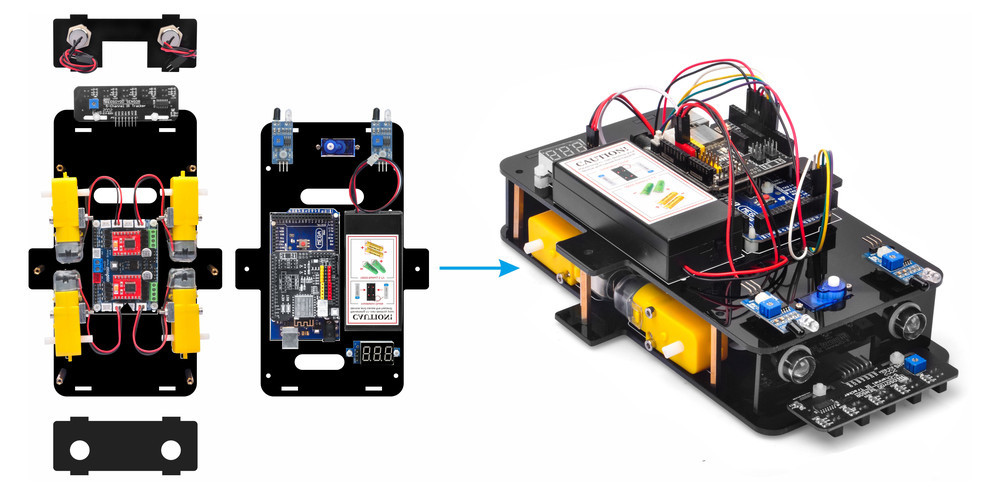
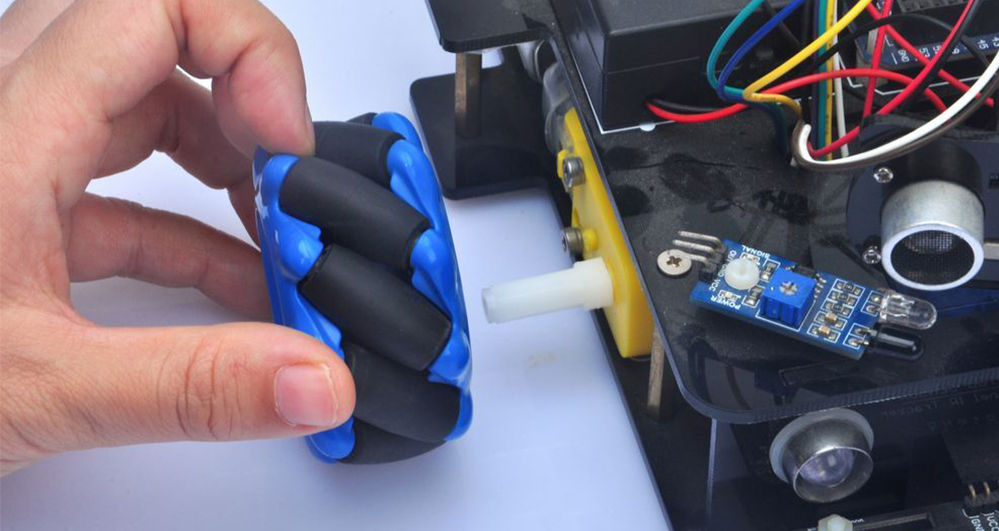
1) Please install the white coupling onto the yellow motor according to the steps shown in the image, ensuring that the coupling is inserted all the way to the base.
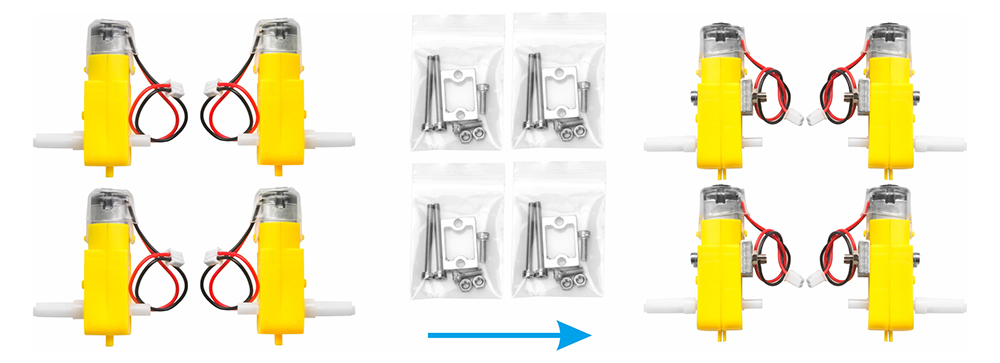
2)Attach the 4 motors using the metal motor holders as shown. (Please ensure the motor orientation is correct before installing the metal motor holders.)
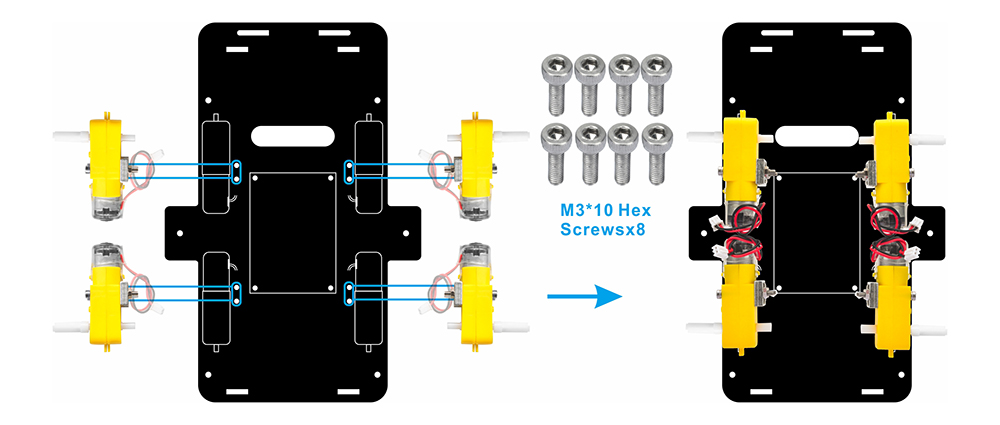
3) Secure the 4 motors to the lower car chassis using M3*10 hex screws and a hex screwdriver, as shown in the image. (The screws required for this step are included in the metal motor holder package.)
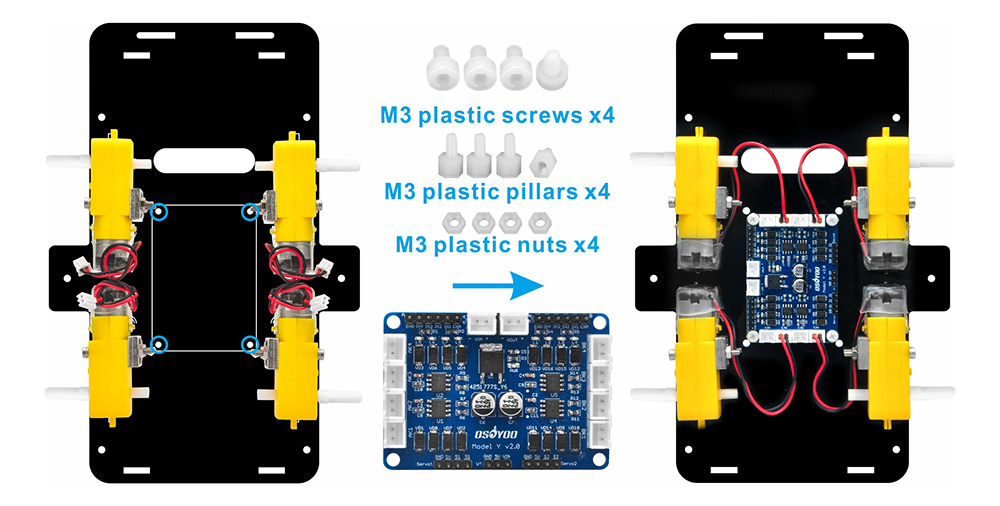
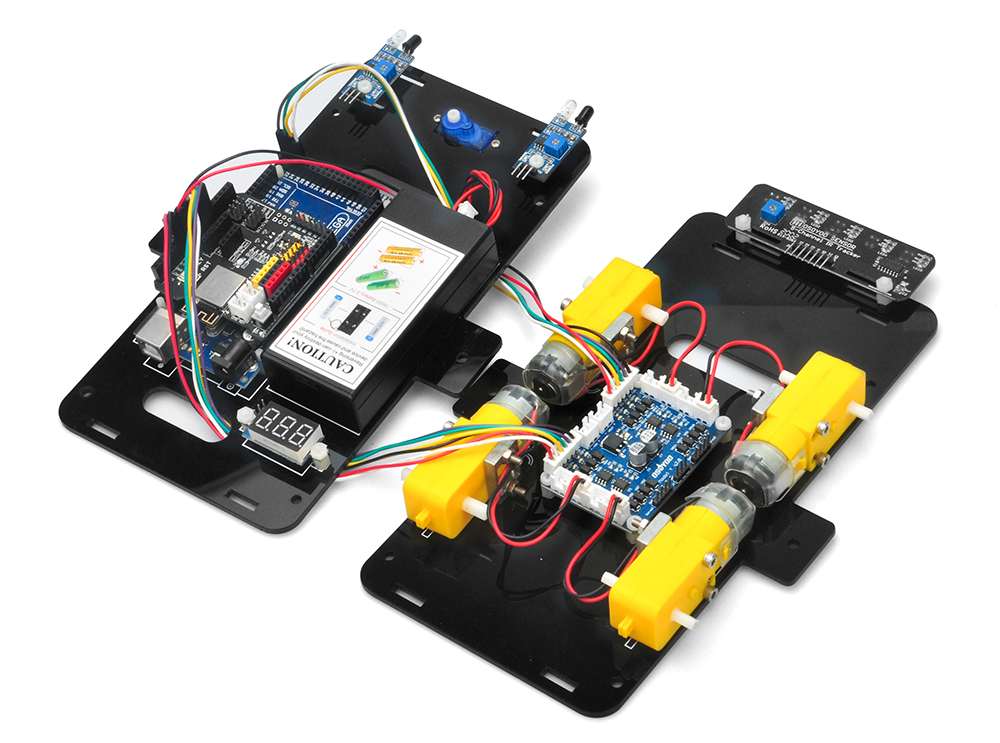
4) Mount the OSOYOO Model Y driver board onto the lower car chassis using 4 M3 plastic screws, plastic pillars, and plastic nuts (It is recommended to install the plastic pillar with the male end facing downward.) . Connect the 4 motors to the K1 and K3 sockets on the Model Y motor driver board, as shown in the diagram.
There are two installation modes for plastic pillars:
A. The male end of the plastic pillar faces downward.
B. The male end of the plastic pillar faces upward.
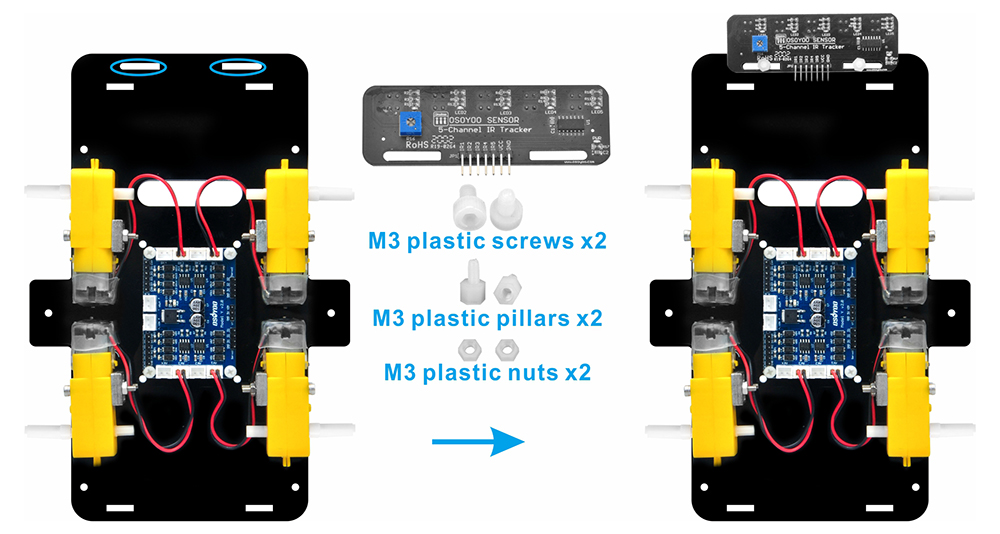
5) Attach the tracking sensor module to the lower chassis using two M3 plastic screws, two M3 plastic pillars, and two M3 plastic nuts (It is recommended to install the plastic pillar with the male end facing upward). Ensure the sensor is securely fixed and properly aligned for accurate functionality.
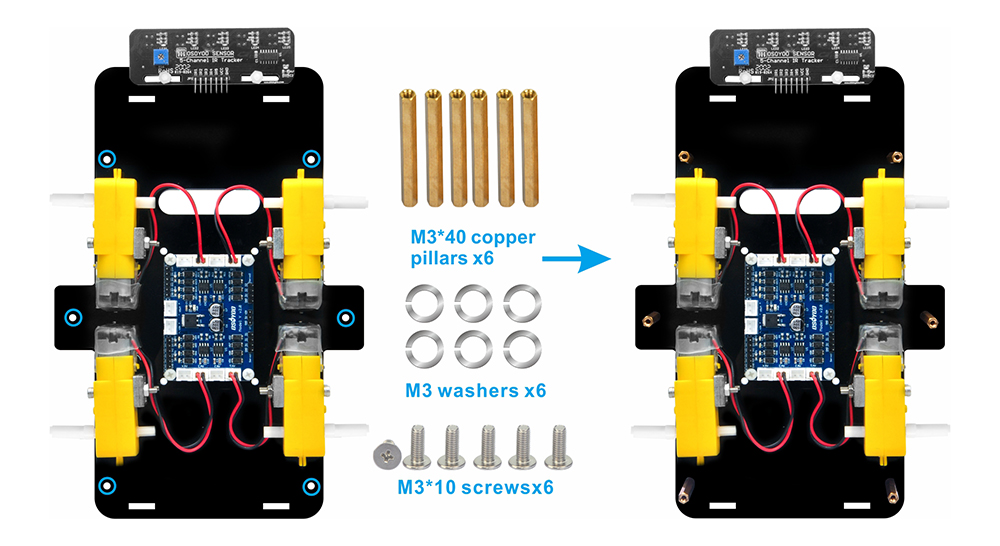
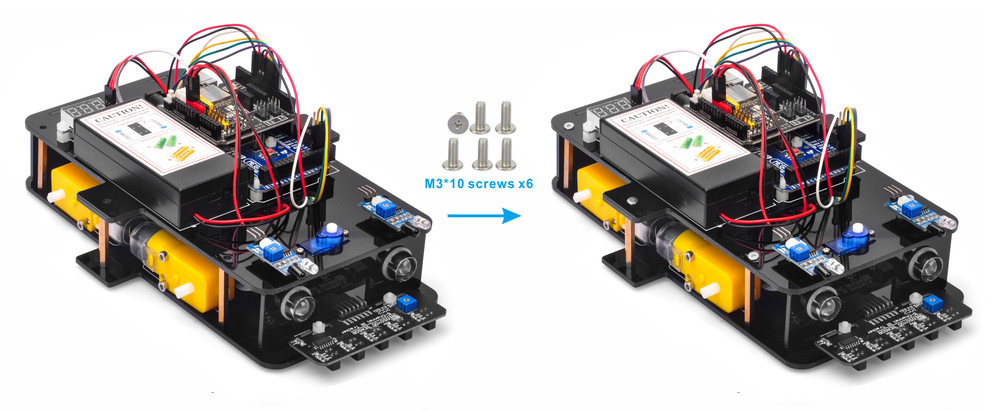
6) Attach six M3*40 copper pillars to the lower chassis using six M3*10 screws and six M3 washers. Ensure the pillars are firmly fixed to provide stable support for the upper chassis.
Slide the washer onto the screw, a washer distributes screw pressure and improves stability when securing screws into metal pillars.
7) Use M3*10 screws and M3 nuts to attach the battery box to the designated markings on the upper chassis.
8) Attach the voltage meter to the designated markings on the lower chassis using two M3 plastic screws, two M3 plastic pillars, and two M3 plastic nuts. (It is recommended to install the plastic pillar with the male end facing upward.)
9) Secure the OSOYOO Mega2560 board to the upper chassis using six M3 plastic screws, six M3 plastic pillars, and two M3 plastic nuts. (It is recommended to install the plastic pillar with the male end facing upward.)
Insert the OSOYOO UART WiFi Shield into the Mega2560 board. Ensure it is properly aligned and securely connected to establish a stable communication interface.
10) Using two M2.2*8 self-tapping screws, mount the servo motor at the front of the upper chassis.
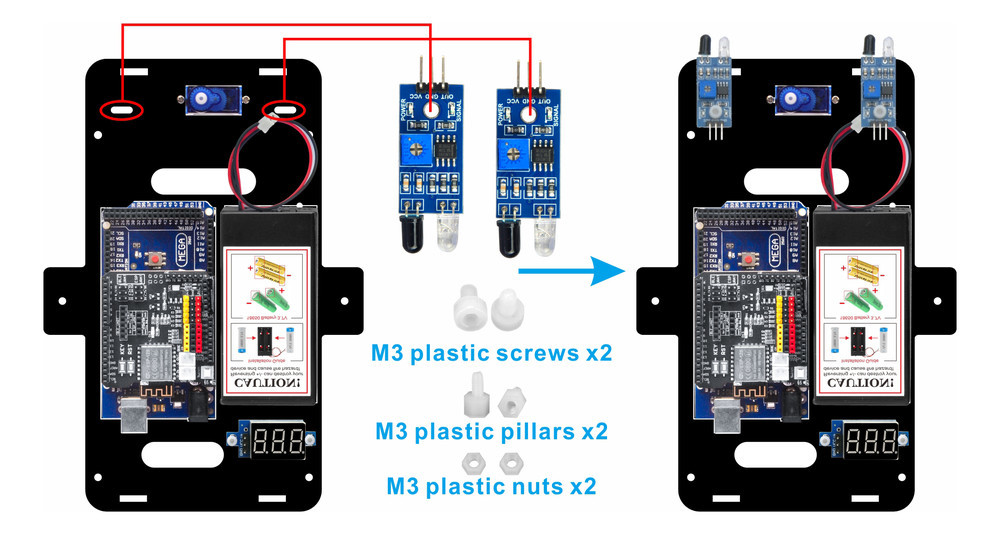
11) Attach two IR distance sensors to the front of the upper chassis using two M3 plastic screws, M3 plastic pillars, and M3 plastic nuts. To secure the sensors tightly, It is recommended to install the plastic pillar with the male end facing upward.
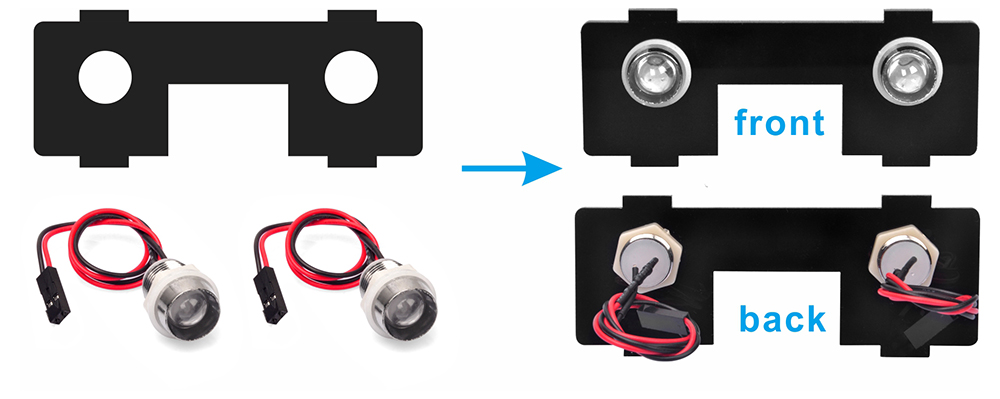
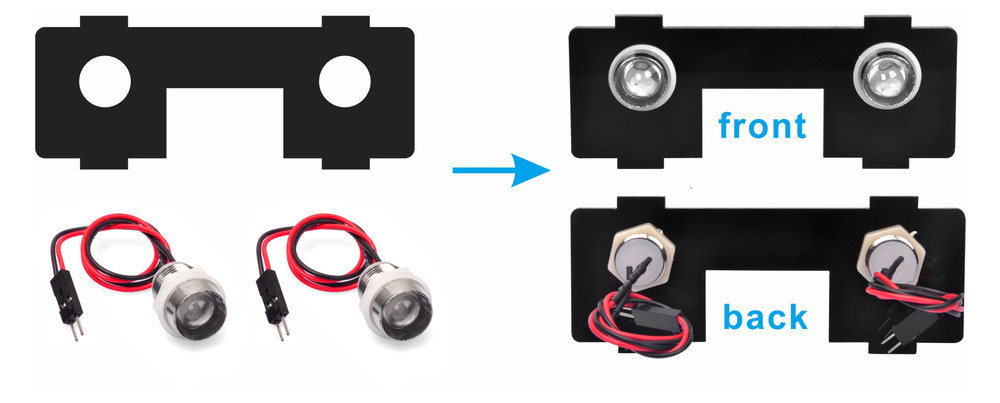
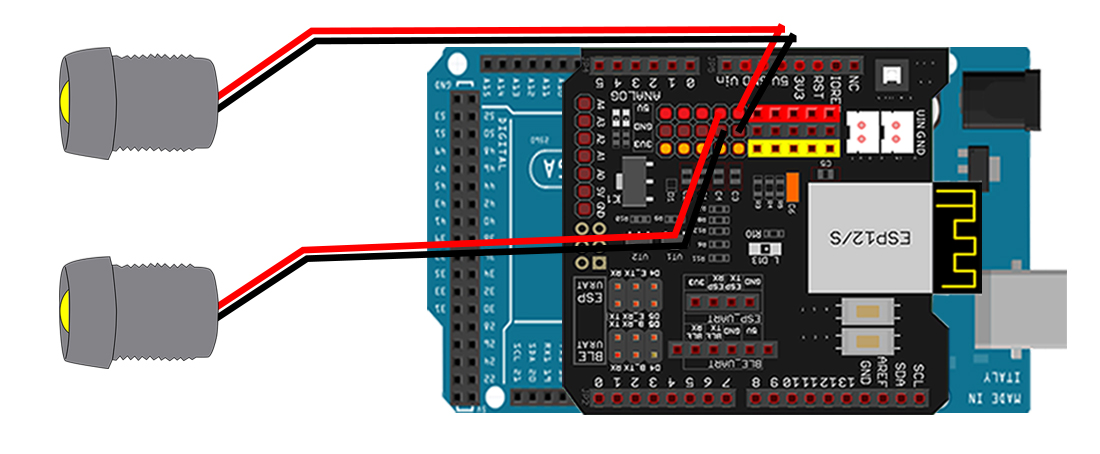
12) Mount two LED lights onto the front barrier plate as shown in the diagram.
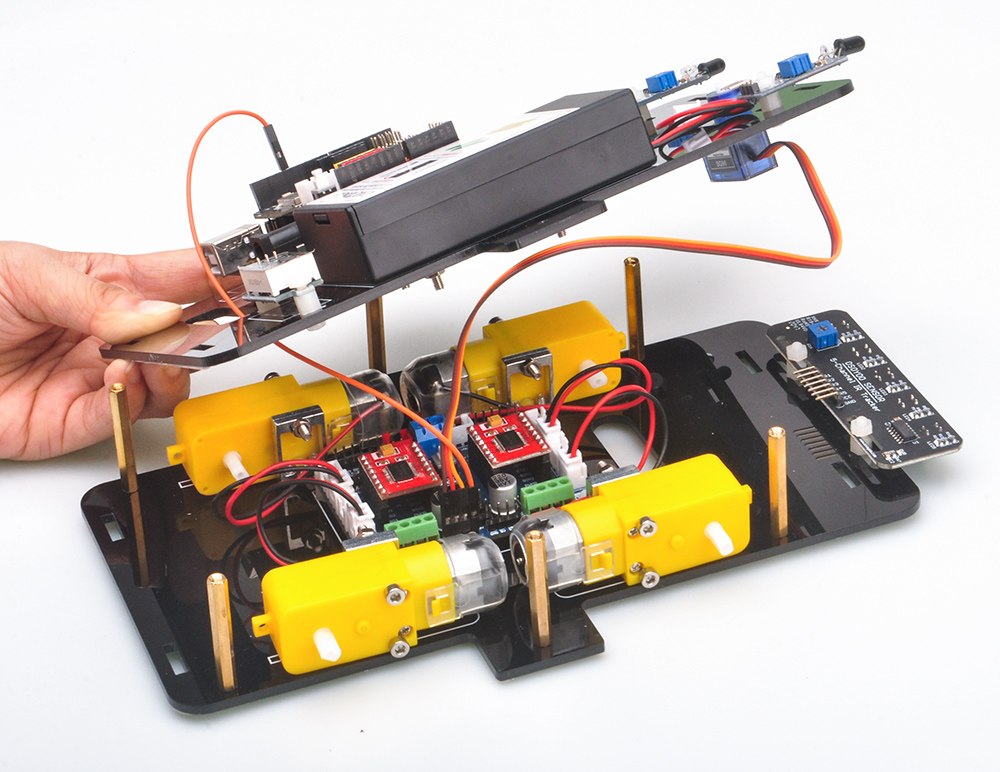
13) Ensure all necessary circuit connections are completed before assembling the upper and lower chassis.
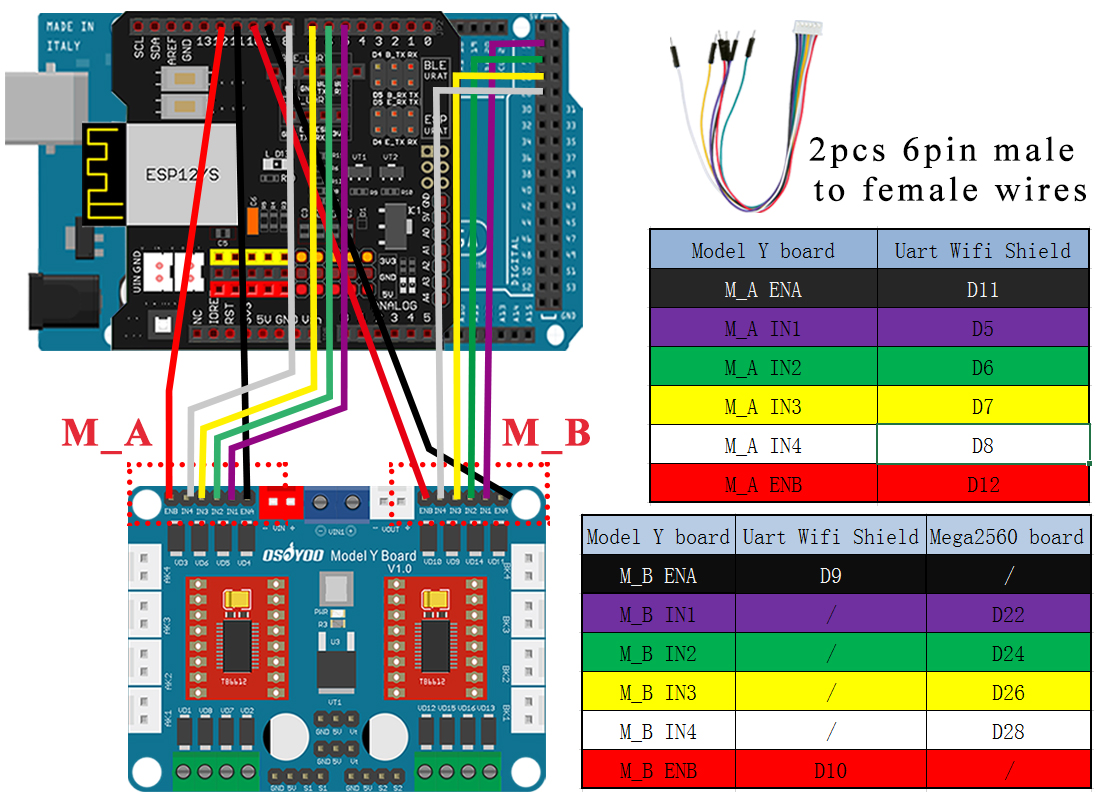
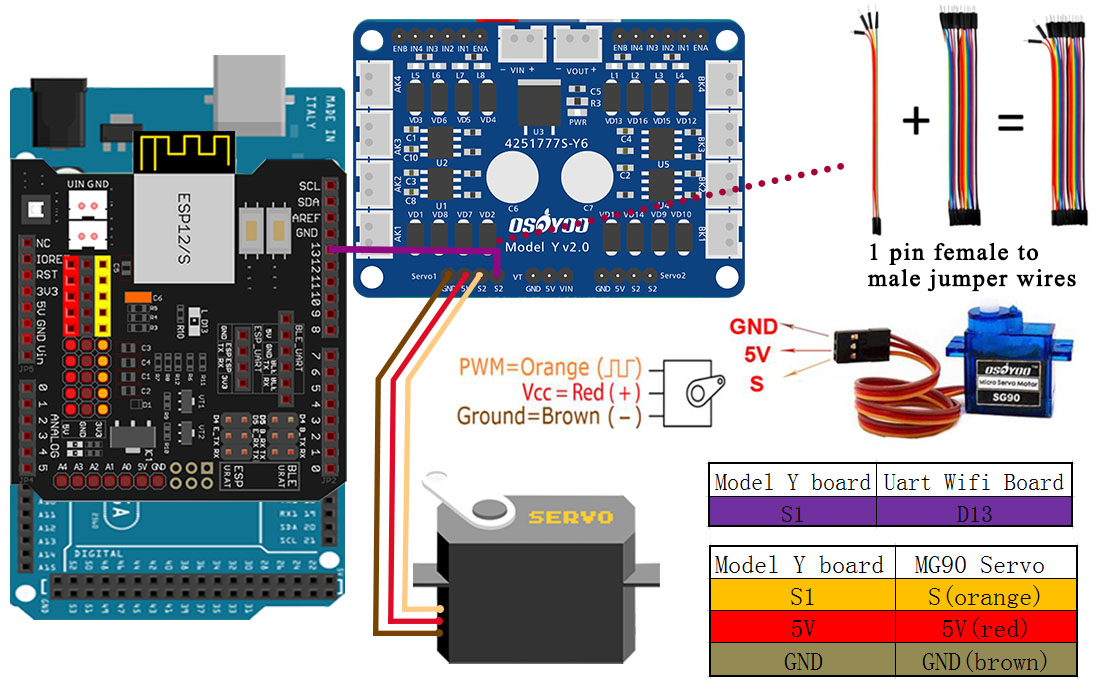
14) Connect the OSOYOO Model Y Board to the UART WiFi board.
Use two 6-pin male-to-female jumper wires to connect the OSOYOO Model Y board to the UART WiFi shield as shown in the diagram:
Route the 6-pin wires in Area M_B through the hole near the SG90 servo.
Route the 6-pin wires in Area M_A through the hole near the voltage meter.
Caution:
When insert/remove this 6-pin plug into Model Y 6-pin male socket, please hold the plastic pin-holder to do operation. Never drag the wires to pull the plug out of the socket, otherwise it will damage the wires.
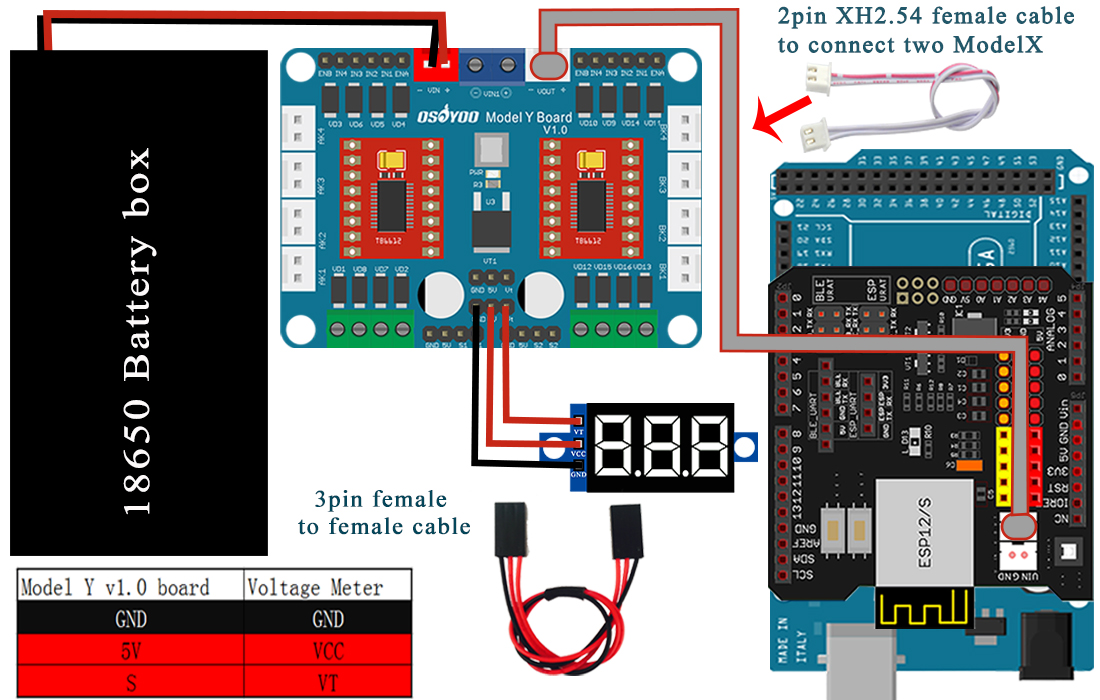
15) Connect the voltage meter to the OSOYOO Model Y board using a 3-pin female-to-female jumper wire as shown in the connection diagram.
Connect the battery box to the VIN socket of the OSOYOO Model Y board according to the diagram.
Connect the VOUT socket of the OSOYOO Model Y board to the VIN socket of the WiFi shield using a 2-pin PnP cable as illustrated.
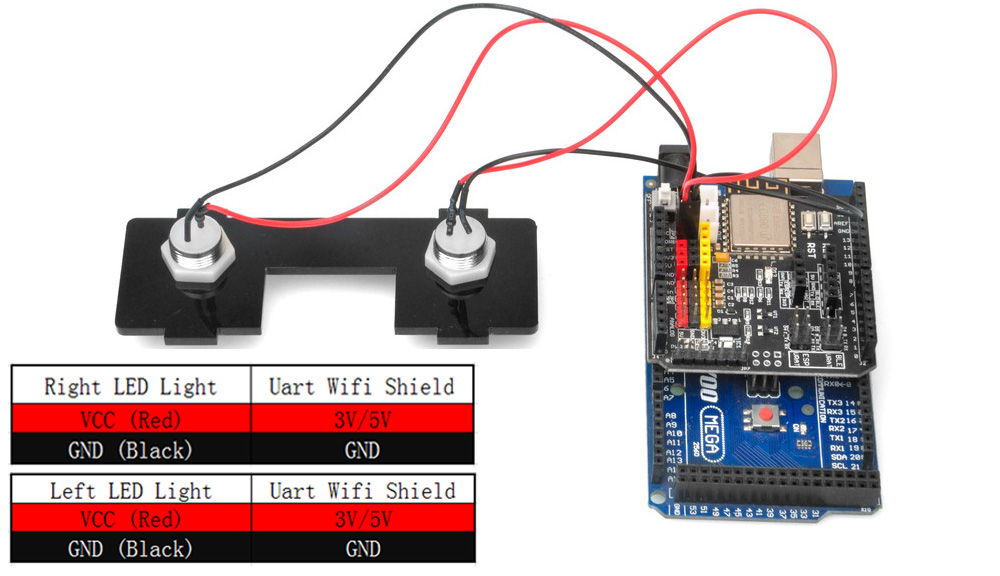
16) Mount 2 LED lights on the front transverse diaphragm.
Connect the red wires (VCC) of the LED lights to the 3V or 5V pins, and the black wires (GND) to the GND pins on the UART WiFi shield.
Note: If the wire of the LED light you receive has a male connector end, you can plug it into the female connector end of the Wi-Fi board; If the wire of the LED light you receive has a female connector end, you can plug it into the male connector end of the Wi-Fi board. Additionally, this LED light can use the 3.3V port, and it can also use the 5V port. This just results in different brightness levels of the LED but will also consume more power.
17) Connect the servo motor’s orange wire (PWM) to S, red wire (VCC) to 5V, and brown wire (GND) to GND on the Model Y board.
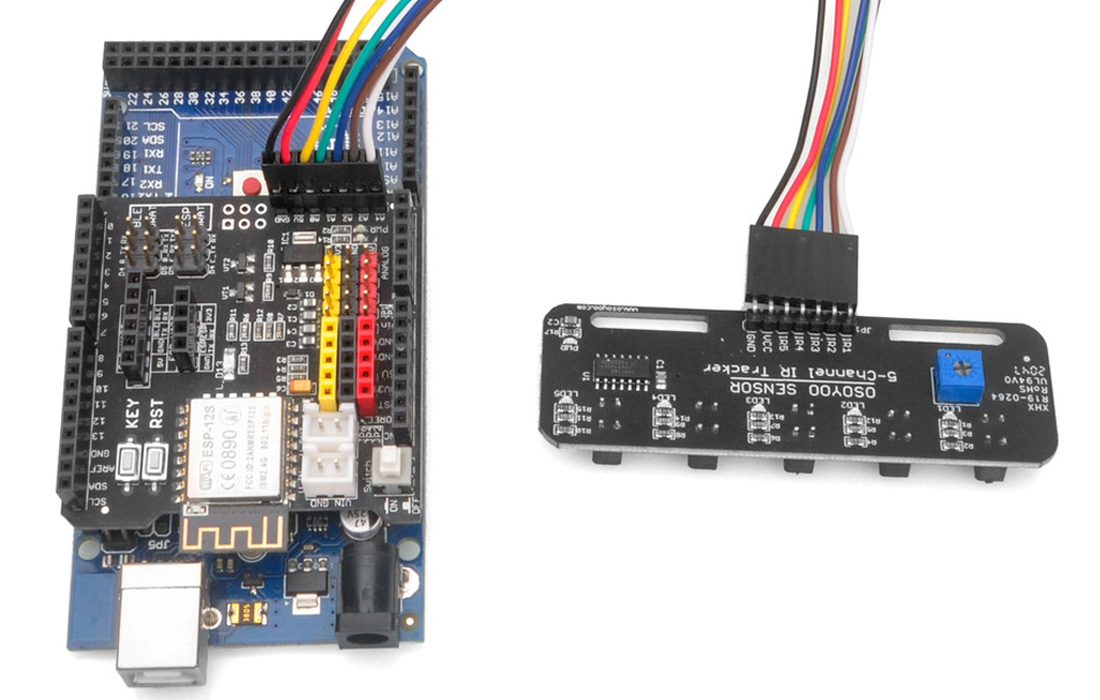
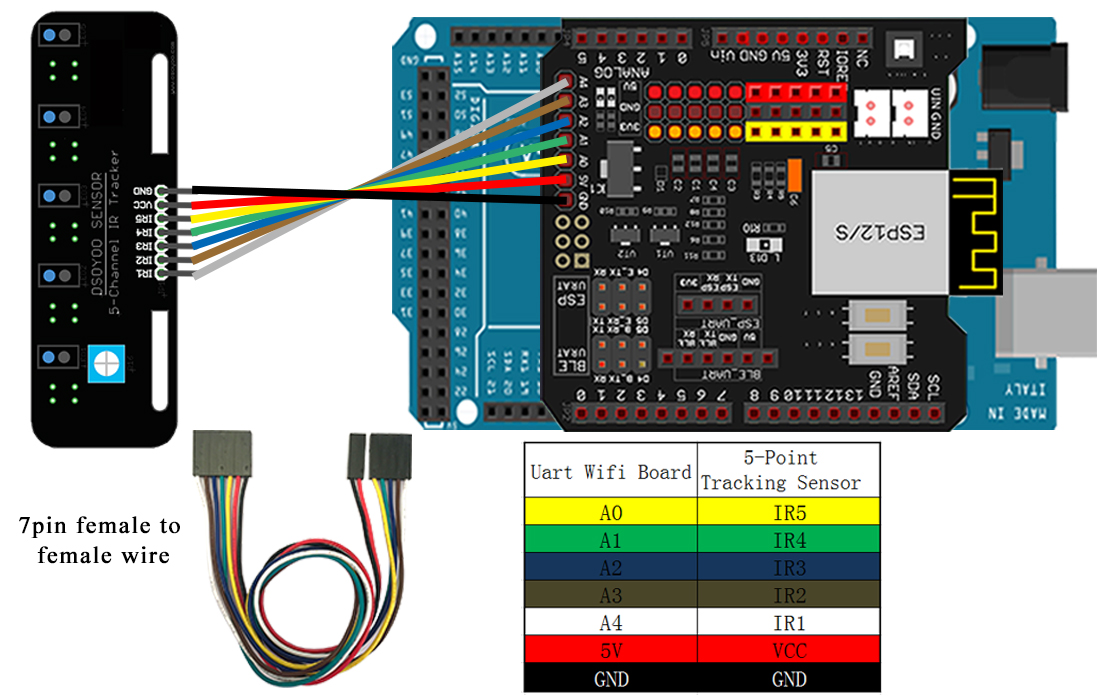
18)Connect GND-VCC pin of tracking sensor module to GND-5V of OSOYOO Uart WiFi shield V1.3; connect IR1, IR2, IR3, IR4, IR5 pins to A4, A3, A2, A3, A1 with 7pin 25cm female to female cable as the following photo shows.
19)Fix upper chassis to lower chassis with 6pcs M3*10 hex screws.
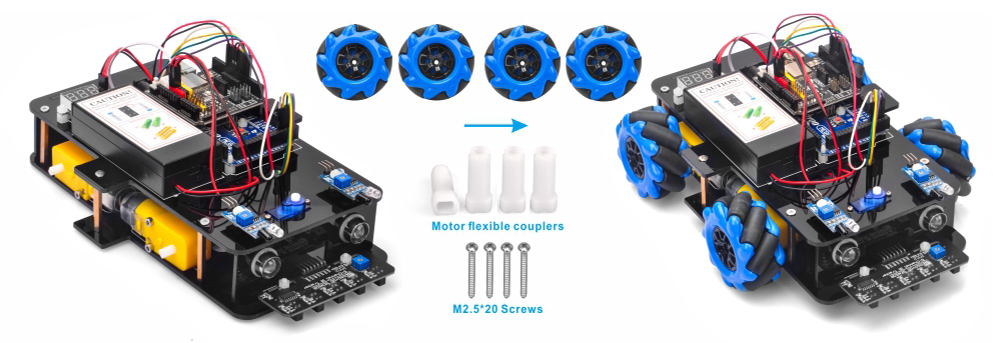
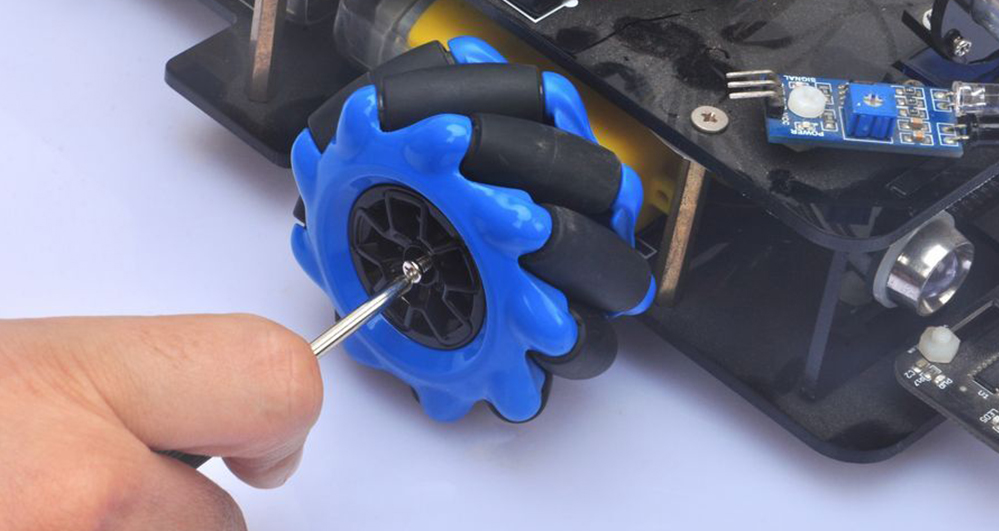
20)Install 4 wheels onto the motors with 4pcs M2.2×22 screws or M2.5X20 or M2.6×20 Self-tapping screws.
Special Note: Some user might found that the M2.2 screw might be too short to fix the wheel to the car, if this is your case, please contact OSOYOO support ([email protected]) and ask for free new M2.5×20 screws
Note: there are two types and to arrange them so the rollers point toward center of car when viewed from above.
Now hardware installation is almost down. Before we install 18650 batteries into the box, we need burn the sample code into Arduino First.
Step 1: Install latest Arduino IDE (If you have Arduino IDE version after 1.1.16, please skip this step). Download Arduino IDE from https://www.arduino.cc/en/Main/Software?setlang=en , then install the software.
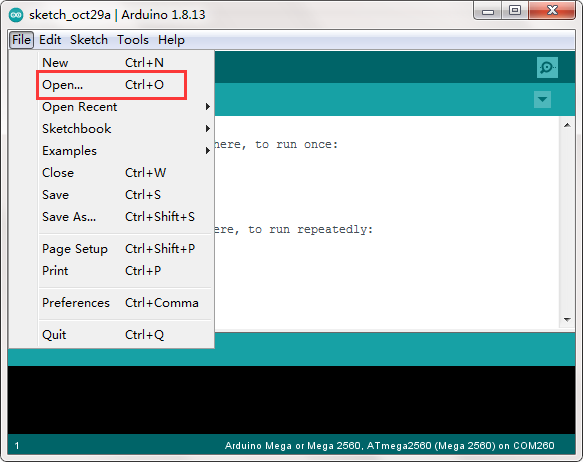
Step 3: Connect Mega2560 board to PC with USB cable, Open Arduino IDE -> click file -> click Open -> choose code “mc-lesson1.ino” in lesson1 folder, load the code into arduino.
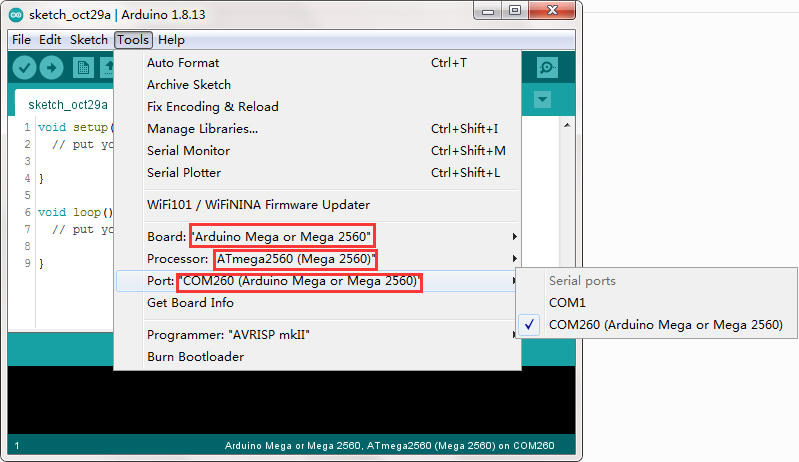
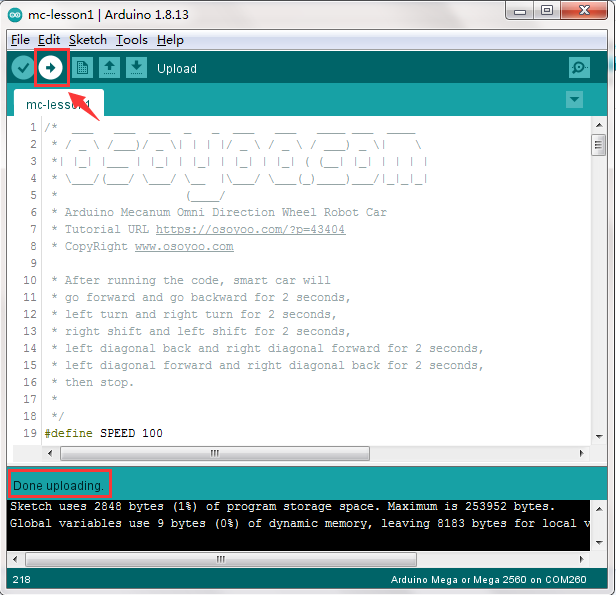
Step 4: Choose corresponding board/port for your project,upload the sketch to the board.
Note:
If the car runs properly when powered via USB (e.g., the wheels spin when lifted off the ground) but does not work when the USB is disconnected and the batteries are correctly inserted, check the switch on the double-driver Y board. It may have been accidentally toggled upward. Use a screwdriver to push it down without disassembling the car.
Final Setup:
Disconnect the Arduino from the PC and insert batteries into the battery box. Place the car on the ground and turn on the switches on both the OSOYOO UART WiFi Shield V1.3 and the 18650 battery box (if installed).
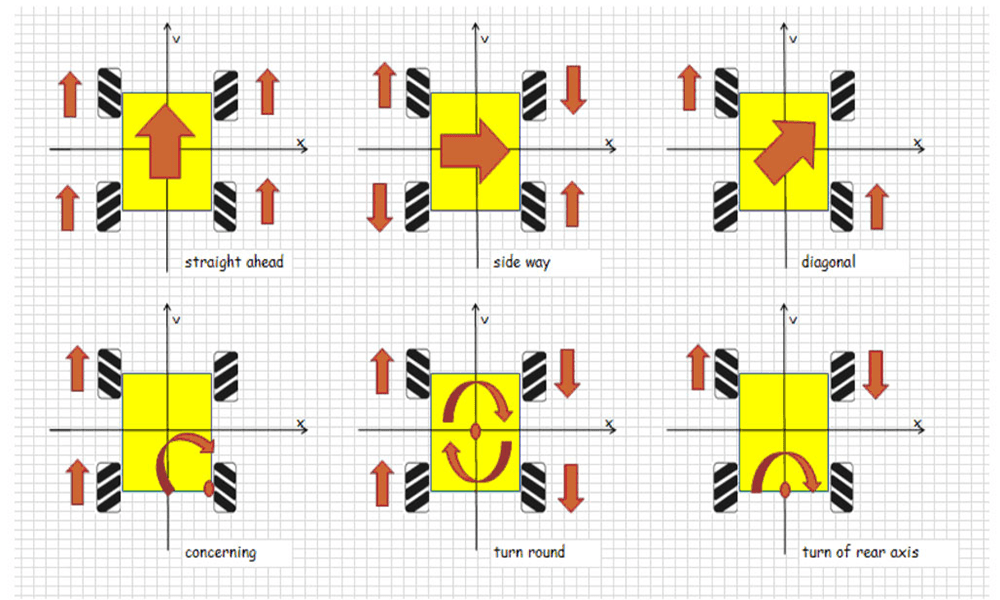
The car should perform the following sequence:
Forward → Backward → Left Turn → Right Turn →
Right Parallel Shift → Left Parallel Shift →
Down Left Diagonal → Up Right Diagonal →
Up Left Diagonal → Down Right Diagonal, and then stop.
Troubleshooting
If, after running the Lesson 1 code, you notice that one side wheels are not turning, or one side wheels can only move forward but not backward, or only backward but not forward, the issue is likely a loose or broken wire in the 6-pin cable connecting to the Model Y board.
Here is the solution:
Step 1: Disconnect the 6-pin cable that connects the Model Y board and the Arduino board.
Step 2: Locate six (6) single spare Female-to-Male jumper wires from your kit (any color is fine).
Step 3: Use these six single jumper wires to manually reconnect the Model Y pins (ENA, IN1, IN2, IN3, IN4, ENB) to the corresponding pins on the Arduino as per previous model Y wire map
Step 4: Retest the Lesson 1 code to see if the issue is resolved. If the problem still exists, you can send your problem detail to [email protected] and our tech support team will help you.


Thank You.