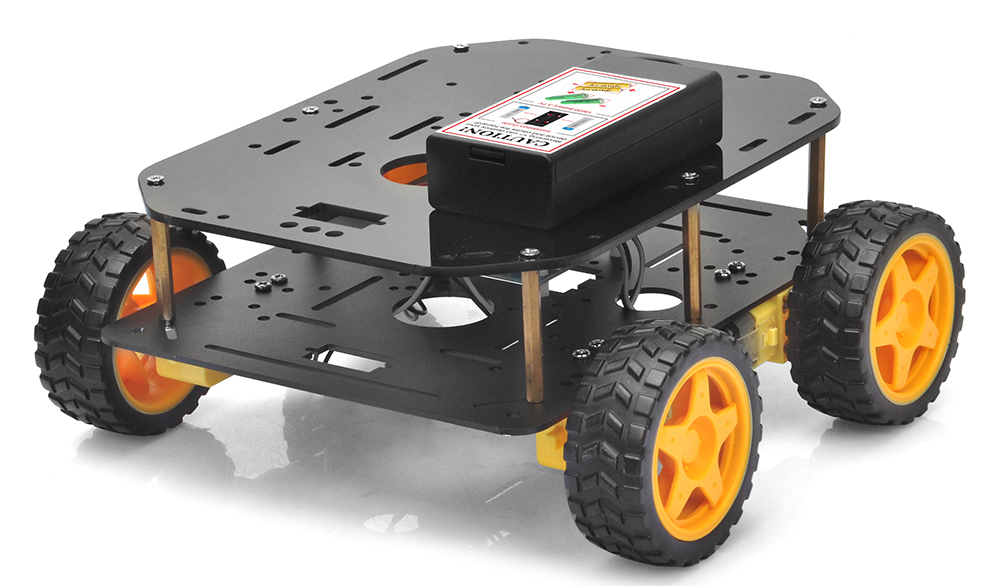
The OSOYOO FlexiRover Robot Building Kit for Arduino is a customizable and versatile robot chassis designed for users aged 15 and up, particularly those with experience in Arduino robotics. While the kit does not include an Arduino board, it is compatible with a variety of Arduino models, allowing users to choose the controller that best suits their needs.
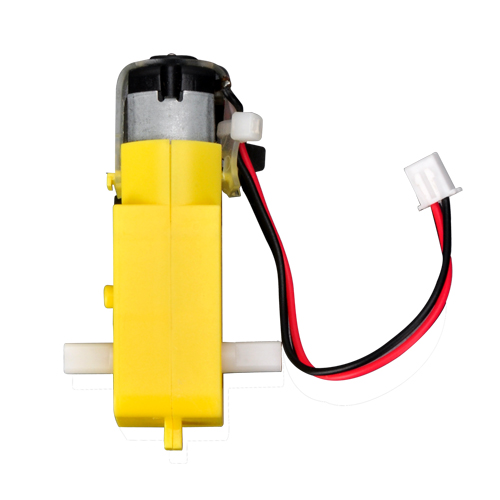
Included in the kit are four TT motors with pre-attached wires for easy setup, along with four durable wheels that ensure smooth, reliable movement on different surfaces. The motors connect to a convenient plug-and-play motor driver board, simplifying setup so users can focus on programming and development instead of complex wiring.
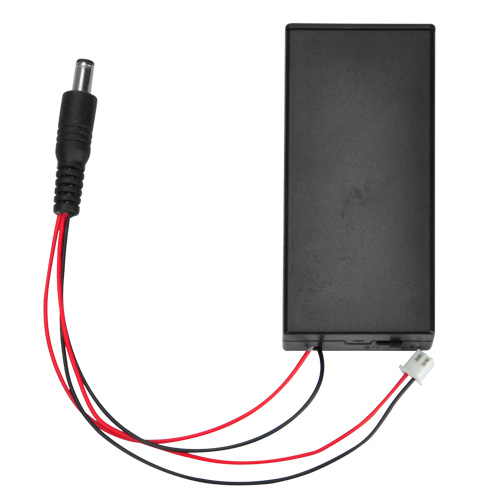
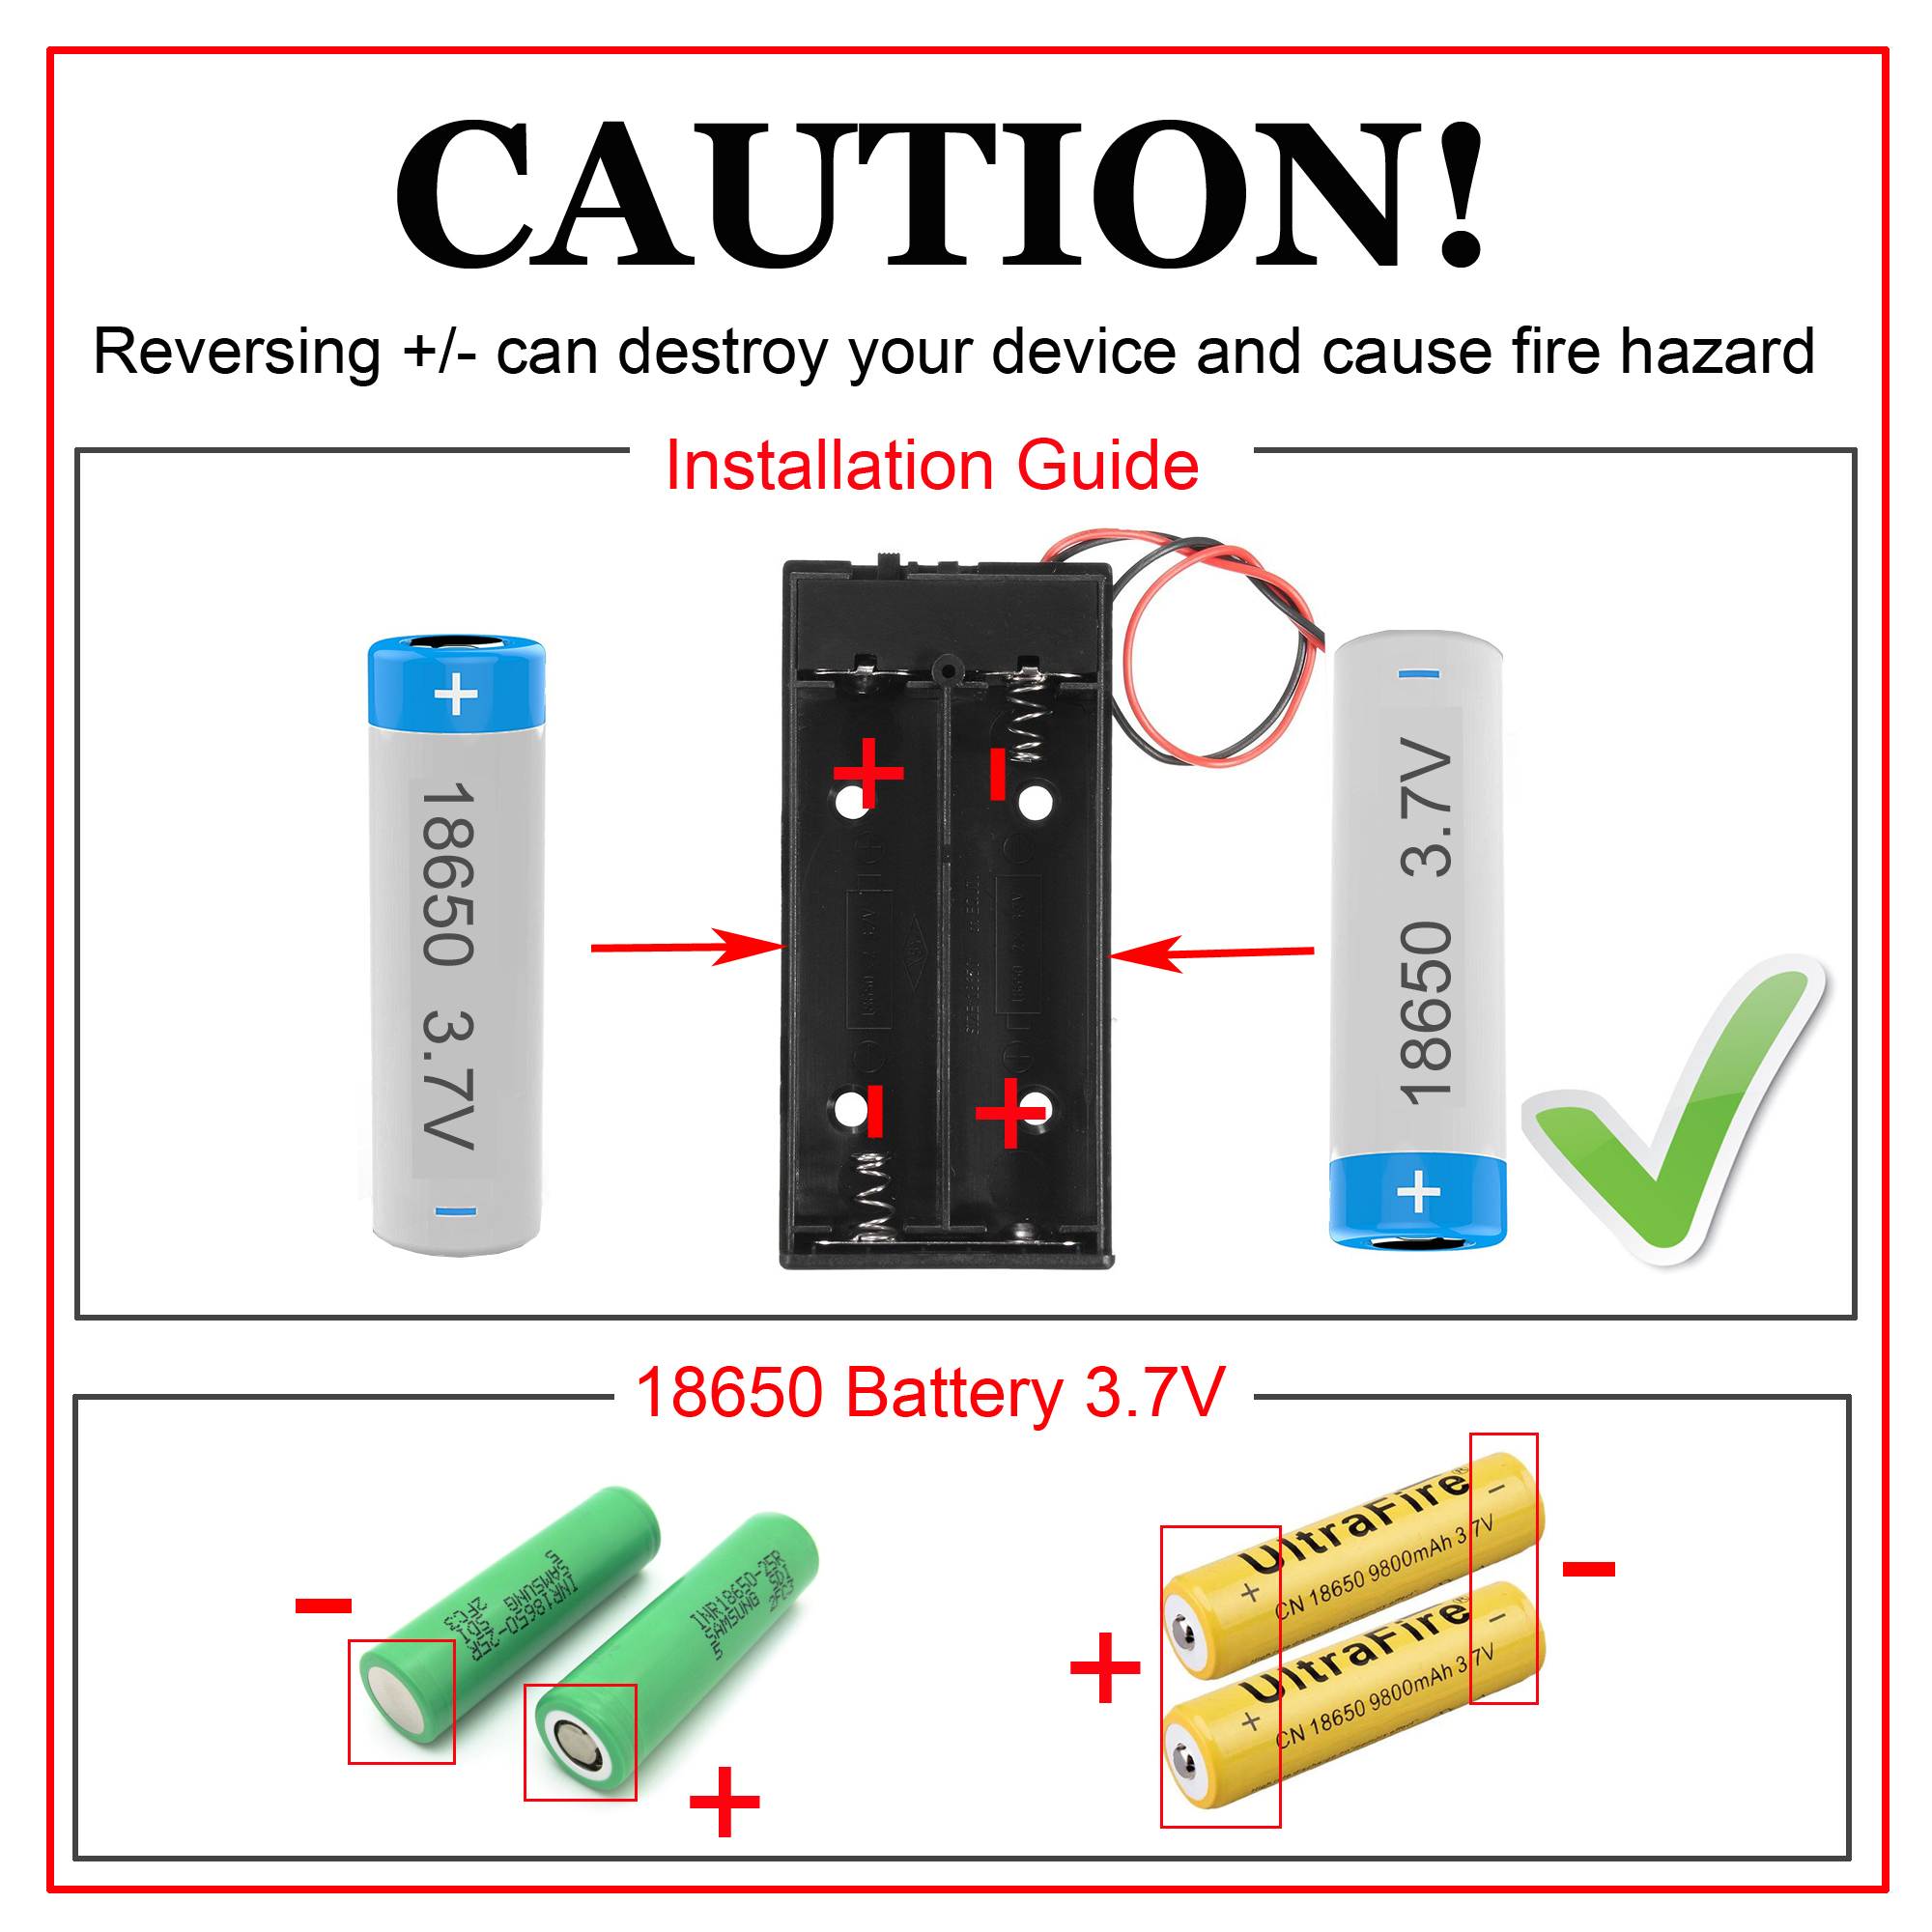
The kit also includes a battery holder with an integrated on/off switch, designed for use with 18650 batteries (not included), ensuring efficient and reliable power management during extended operation.
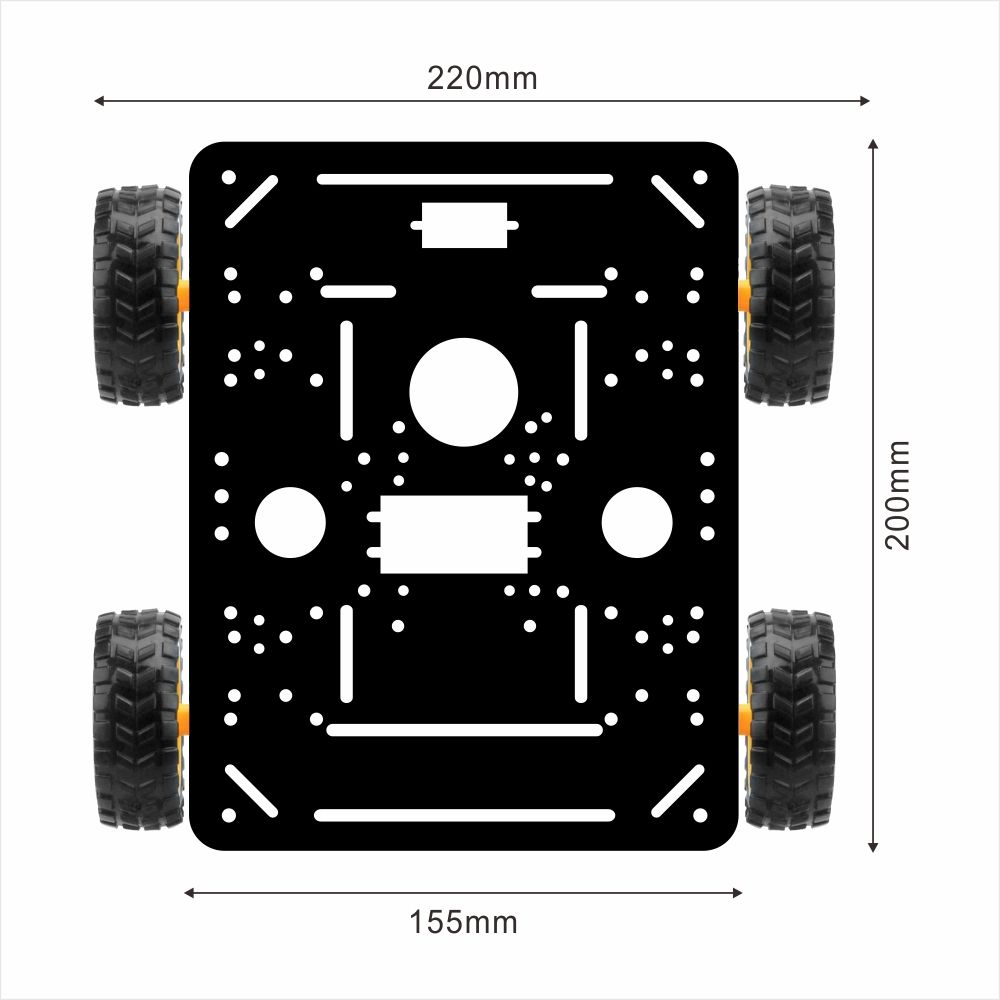
What makes the FlexiRover stand out is its customizable chassis. With multiple pre-drilled holes, the chassis lets users easily attach sensors, cameras, mechanical arms, and other add-ons, offering flexibility for a wide range of robotics applications. This makes the kit ideal for experimentation, educational projects, or building more advanced robotic systems.
With this kit, users can explore and expand their robotics skills by creating unique, customizable robots tailored to their specific needs and projects.
Key Points
No Arduino Board Included – Compatible with various Arduino boards, so you can choose your preferred controller.
Includes 4 TT Motors and Wheels – Pre-wired motors for smooth movement and easy integration.
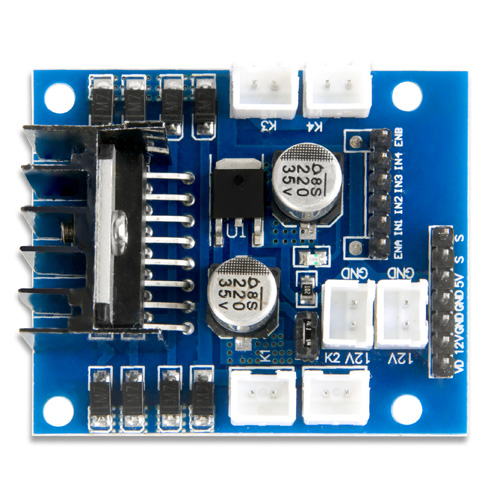
Plug-and-Play Motor Driver – Simplifies motor control and reduces wiring complexity.
Battery Holder with Switch – Ensures efficient power management for reliable, long-term operation.
Customizable Chassis – Pre-drilled holes allow easy attachment of sensors and add-ons, making the kit versatile for different robotics projects.
37 mm metal motor holder — compatible with JGB37-550/545/520 super-high-torque motors
25 mm metal motor holder — compatible with JGB25-370/310 high-torque motors
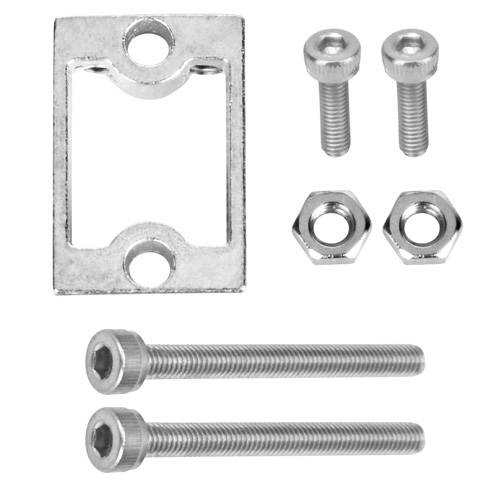
TT metal motor holder — TT motors
Red circle
For OSOYOO Model Y motor driver / OSOYOO Model X motor driver / L298N motor driver
Green circle
For SG90 / MG995 / MG996 servo motors
Yellow circle
For 18650 battery case / 9 V battery case…
Pink-purple circle
For line-tracking sensor / OSOYOO 5-channel tracking sensor / IR obstacle sensor / IR receiver / IR transmitter…
Purple circle
For Arduino UNO R3 / Arduino UNO R4 / Arduino UNO WiFi…
For Arduino Mega 2560 / Arduino DUE
Dark-blue circle
For Raspberry Pi 5 / 4 / 3B / 3A+ / 3B+ / 2B
Package List
Hardware Installation
Install Devices
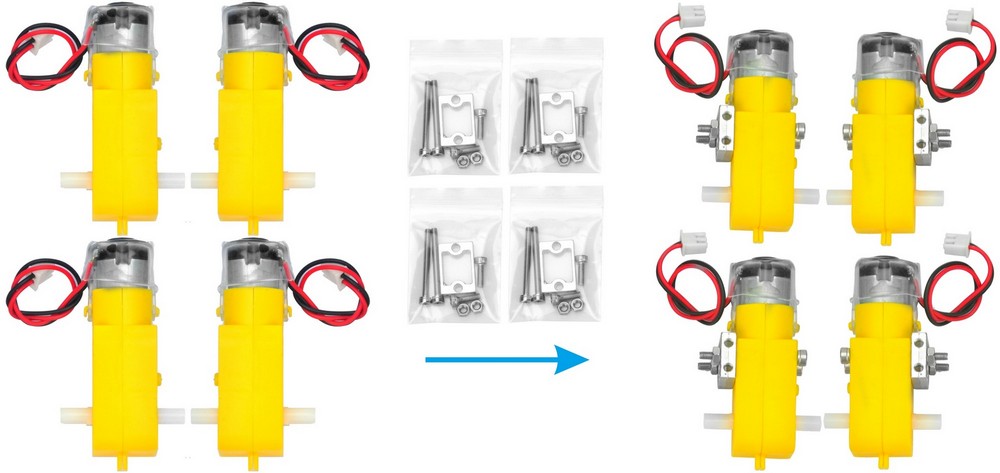
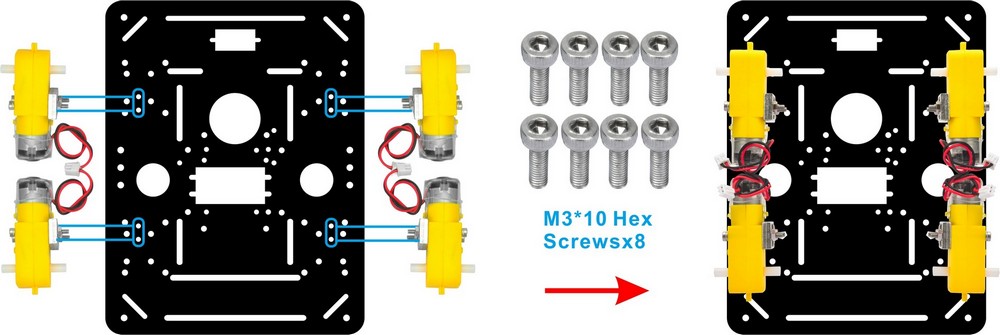
1) Pre-install 4 TT motors with metal motor holders as shown below.
2) Mount the 4 motors on the 1st layer car chassis (metal) using M3×10 hex screws. (Screws are included in the metal motor holder package.)
3) Install the 4 wheels onto the motors and secure them with the wheel screws.
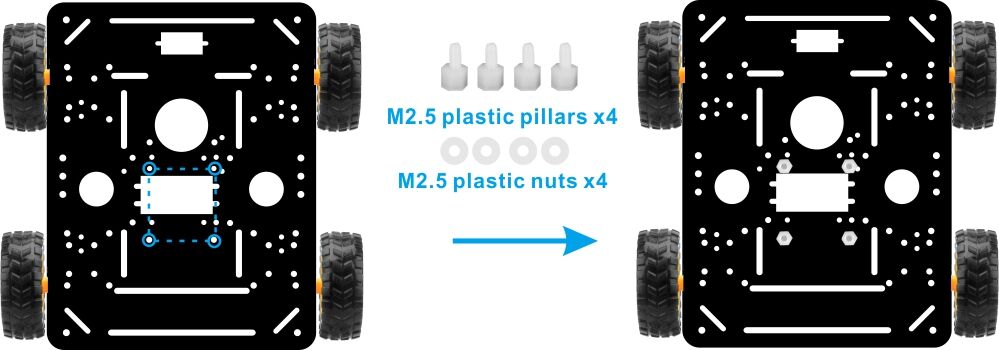
4) Flip the chassis over and mount the OSOYOO Model X motor driver module on the underside of the 1st layer chassis (metal) using 4× M2.5 plastic screws, pillars, and nuts.
5) In this sample project we use an UNO board. Mount the OSOYOO basic board for UNO on the upper chassis using 4× M2.5 plastic screws, pillars, and nuts. (Make sure you install the board on the correct side.)
6) Install the 18650 battery box on the upper chassis using 4× M3×10 screws and M3 nuts.
Connections
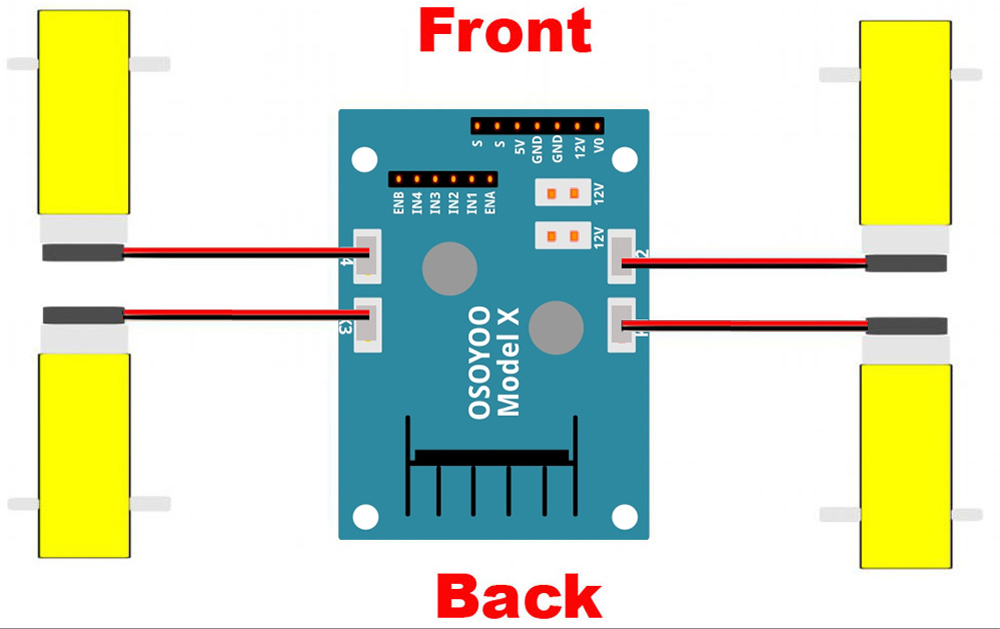
1) Connect the 4 motors to the OSOYOO Model X motor driver module sockets K1 through K4, following the diagram below:
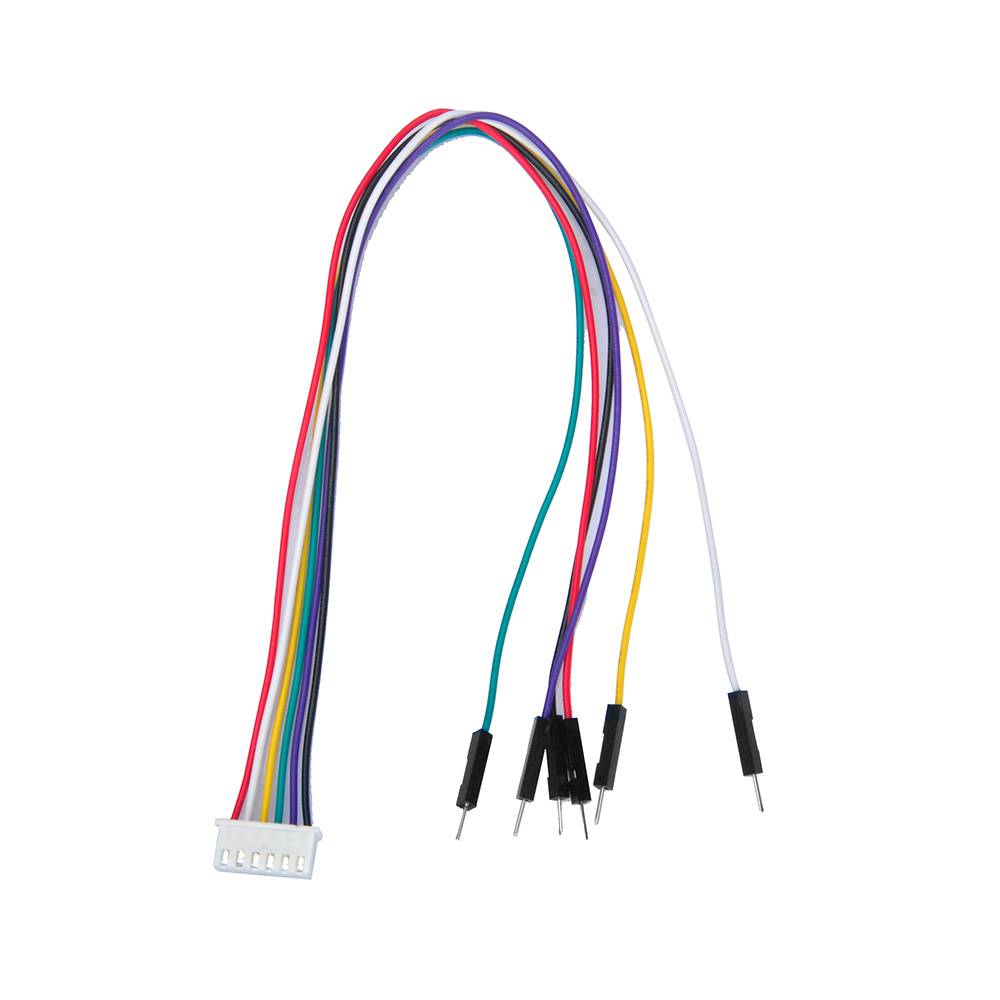
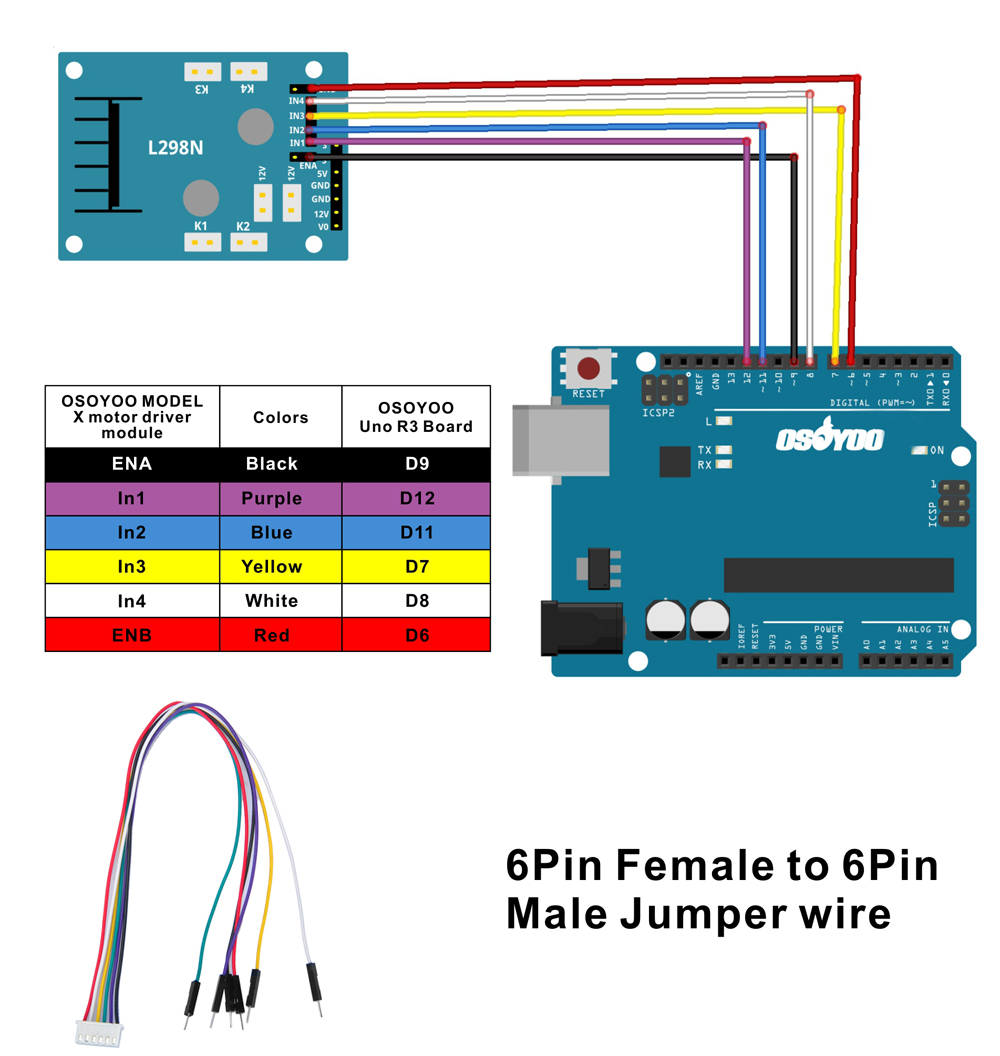
2) Connect the 6 control pins of the OSOYOO Model X motor driver to the OSOYOO basic board: ENA→D9, IN1→D12, IN2→D11, IN3→D7, IN4→D8, ENB→D6, using the 6-pin female-to-male jumper wire as shown below.
Caution: When inserting or removing the 6-pin plug from the Model X 6-pin socket, hold the black plastic connector housing. Never pull the wires directly — this can damage them.
3) Connect the board, battery box, and OSOYOO Model X motor driver module following the connection diagram below.
4) Connect the upper chassis to the lower chassis using five copper pillars. Secure the pillars with 10× M3×10 screws and 10× M3 rubber rings, then install the 4 wheels onto the motors.
Hardware installation is now almost complete. Before installing the 18650 batteries, you need to upload the sample code to the board first.
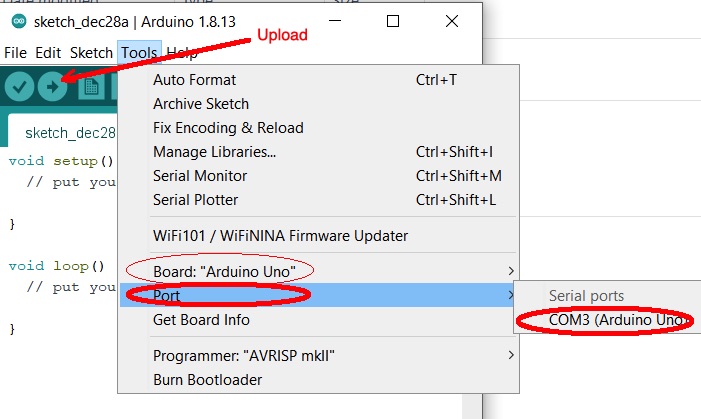
Step 3: Connect the OSOYOO basic board to your PC with a USB cable. Open Arduino IDE → click File → click Open → select the file v2smartcar-lesson1.ino inside the v2smartcar-lesson1 folder, then upload the code to the board. (Note: Turn off your battery or unplug the power adapter before uploading the sketch.)
Step 4: Select the correct board and port for your project, then upload the sketch.
Step 5: Disconnect the car from the PC and install the 18650 batteries into the battery box. (Note: Check the polarity marked on the box and make sure the batteries are inserted in the correct direction — incorrect polarity can damage your device and create a fire hazard.)
Step 6: Place the car on the floor and turn on the switch on the battery box. The car should move forward for 2 seconds, then backward for 2 seconds, then turn left for 2 seconds, then turn right for 2 seconds, and finally stop. (If the car does not behave as described, check your wiring and replace the batteries.)