In this lesson, we will do a line-tracking auto-driving project. We will add a 5-Point tracking sensor module to the robotic car built in Lesson 1. The software in this lesson will read data from the 5-Point Tracking sensor module and automatically guide the smart car to move along the black track line in the white ground.
Lesson 1 must be completed before doing this line-tracking project.
OSOYOO Mecanum wheels robotic car chassis x1
OSOYOO Wheels and motors x4 (left-wheels x2/right-wheels x2)
OSOYOO Mega2560 board, fully compatible with Arduino UNO/Mega2560 x1
OSOYOO Uart Wi-Fi shield x1
OSOYOO Model Y driver board x1
OSOYOO Voltage meter x1
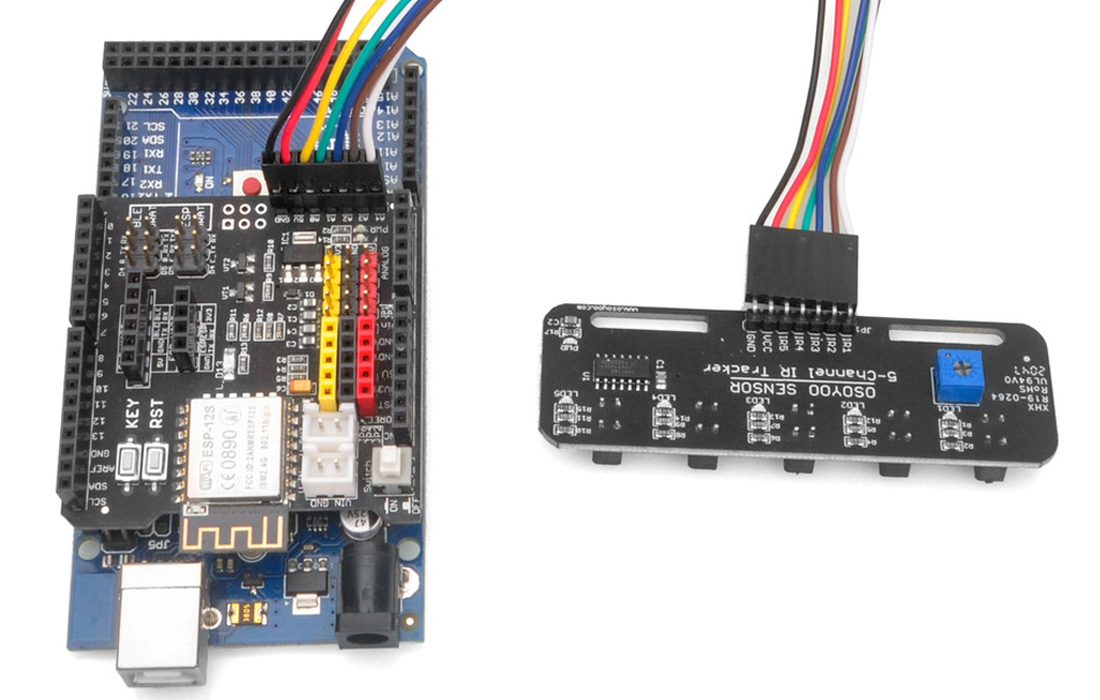
OSOYOO 5-point tracking sensor module x1
OSOYOO Battery box x1
OSOYOO 3pin female to female jumper wire x1
OSOYOO 6pin male to female jumper wire x2
OSOYOO 7pin female to female jumper wire x1
OSOYOO 2 pin XH2.54 PnP female to female x1
18650 Batteries(3.7V) x2
Battery charger x1
Step 1. Ensure all connections from Lesson 1 remain unchanged. Do not remove any existing wires installed during Lesson
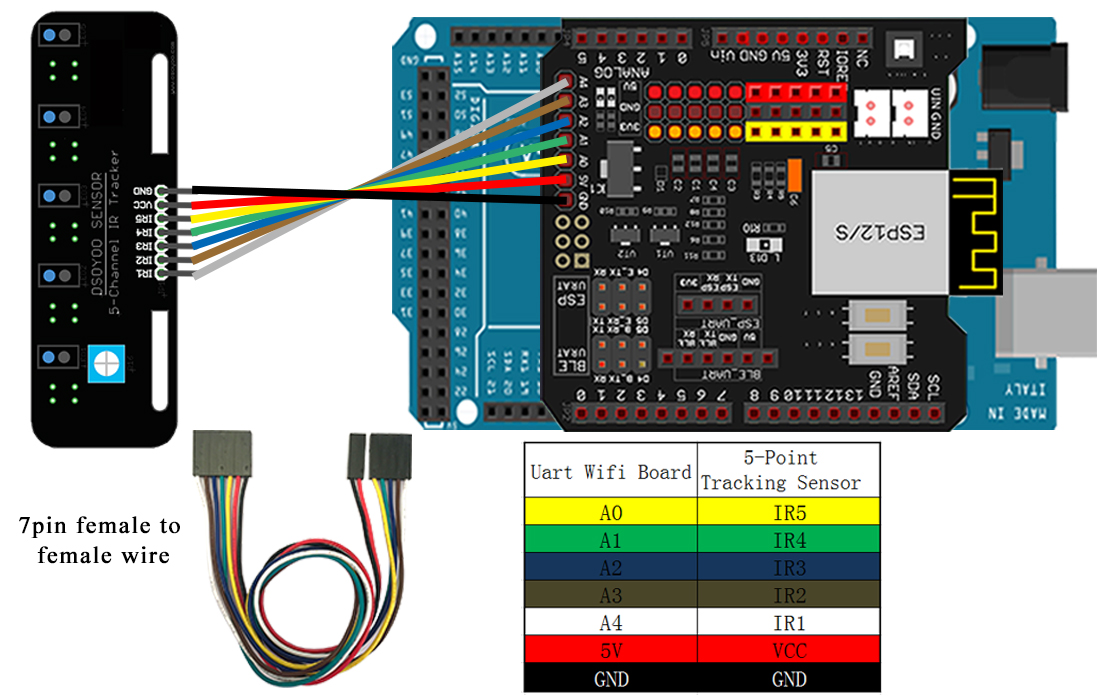
Step 2. Connect the GND and VCC pins of the tracking sensor module to the GND and 5V pins on the OSOYOO UART WiFi Shield.
Connect the IR1, IR2, IR3, IR4, and IR5 pins to A4, A3, A2, A2, and A1, respectively, using a 7-pin 25cm female-to-female cable, as shown in the photo.
Step 1: Install latest Arduino IDE (If you have Arduino IDE version after 1.1.16, please skip this step). Download Arduino IDE from https://www.arduino.cc/en/Main/Software?setlang=en, then install the software.
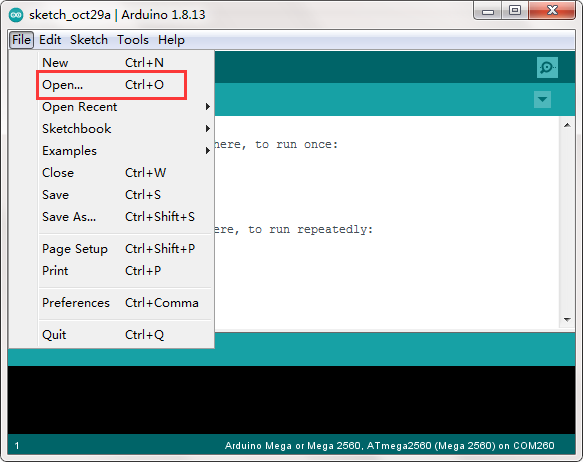
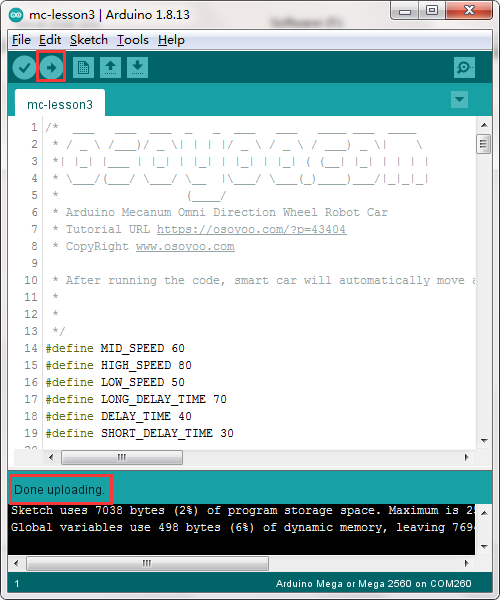
Step 3: Connect Mega2560 board to PC with USB cable, Open Arduino IDE → click file → click Open → choose code “lesson3.ino” in lesson3 folder, load the code into Arduino.
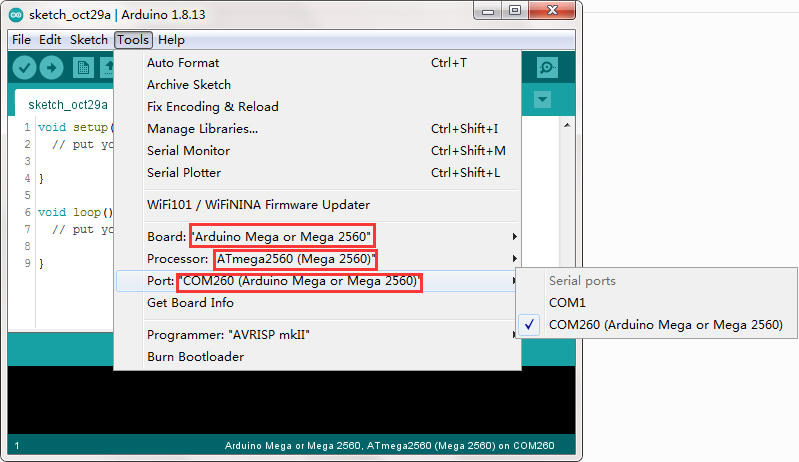
Step 4: Choose corresponding board/port for your project, upload the sketch to the board.
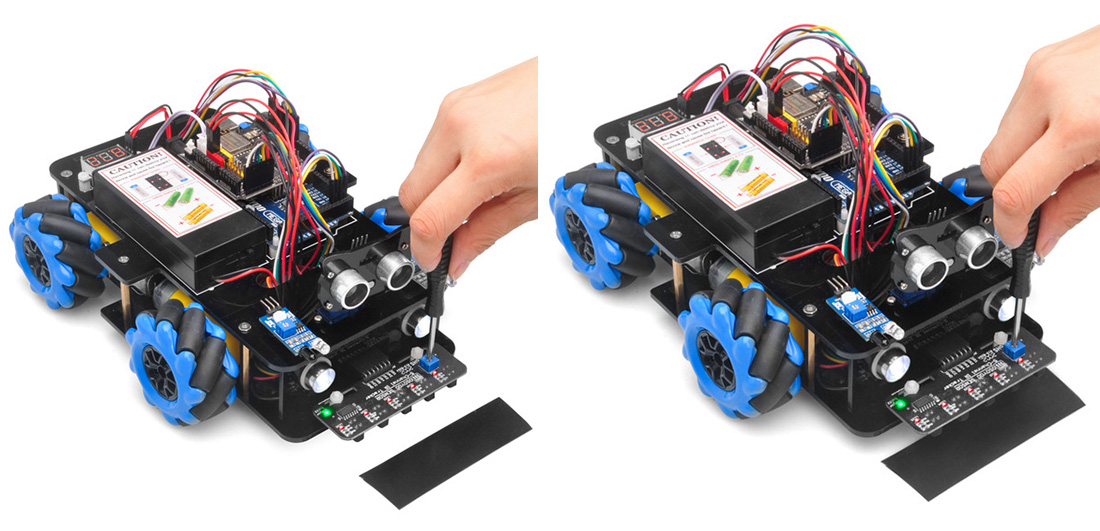
Adjusting the Sensitivity of Tracking Sensor Modules.
Turn on the car and hold it in place. Use a Phillips screwdriver to adjust the potentiometer on the tracking sensor module. Fine-tune it until you achieve optimal sensitivity:
The signal indicator LED should turn on when the sensor is positioned over a black track.
The signal indicator LED should turn off when the sensor is positioned over a white surface.
Final Testing:
Prepare a black track (the width of the black track is more than 20mm and less than 30mm) in white ground. Please note, the turning angle of track can’t be too sharp, otherwise the car will move out of the track.
Turn on the car and put the middle of tracking sensor module facing over black track, and then the car will move along the black track.